


Docker is an indispensable tool for development. Knowing your way around it makes you more productive -- getting things done faster. This blog incorporates some of the Docker know-hows (updated frequently) that will help you to get the best experience from Docker development.
Last Updated: Oct 20, 2023
Overwriting Entrypoint
Whenever you use the docker run command the first process that runs inside of your container is determined by the ENTRYPOINT command.
The most common thing you want to do with a container is to attach a pseudo-terminal to it. We do it using:
docker run -it <image-name>  <shell-name>
docker run -it ubuntu:latest bash
Now if you are using some images like the official AWS python image, you can’t actually do it by default.
docker run -it amazon/aws-lambda-python sh

You get some generic info related to lambdas like your current working directory and handler but no sign of a terminal 🤔. If you dig into the image layers we can see that at the end of the Dockerfile there’s an ENTRYPOINT command that runs a shell script.
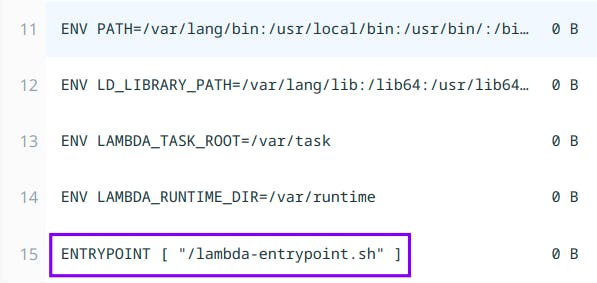
Docker is pretty flexible in how we want to make it work. So we can overwrite the default ENTRYPOINT which can be any valid Linux command and attach a pseudo-terminal.
docker run --rm -it --entrypoint sh amazon/aws-lambda-python
Create Images from running containers
Docker offers the ability to export a new Image from a running container. This can be handy when you quickly need whatever you're running in a container as an image that can be distributed for debugging or playing around. Note that, this will not export data from any volume attached to the container.
Example :
Run a base Ubuntu container:
docker run --rm -it --name ubuntu-base ubuntu:latest bash
Install a few tools that you always require, perhaps Vim, cURL, iputils-ping, to name a few.
Inside the container:
apt update && apt install -y vim curl iputils-ping
Now on your host terminal, you can commit the contents of the running container and create a new image:
docker commit ubuntu-base ubuntu:tools
Now if we run the image ubuntu:tools, we'll have the tools like vim, cURL already installed to work with.
docker run --rm -it ubuntu:tools bash
With the --change or -c flag we can also overwrite Dockerfile instructions.
Let's say we want to overwrite ENTRYPOINT and CMD of ubuntu:tools and create a new image that pings a certain URL.
# Create a container
 docker create --name ubuntu-tools ubuntu:tools

# Commit a new image overwriting ENTRYPOINT and CMD
 docker commit -c 'ENTRYPOINT ["ping"]' -c 'CMD ["google.com"]' ubuntu-tools ubuntu:ping
Now if we run our new image, it'll be running ping command by default.
The best part about it is, that you won't require a Dockerfile to do any of this. But keep note that, this is intended to be used for quick debugging and not for production usage.
One-off containers
Sometimes we just want to run the container for a single purpose, and don’t need it in our system. These can be cases where we want to attach a terminal inside an image and check for contents or debug something, run a container for testing purposes, and all the other things that might float your boat.
For that kind of need, docker ships with the --rm command, when you run your container with it, it immediately removes the container instead of putting it in a stop state.
By default, when you stop a container, it is in a dormant state but occupies space on your hard drive. You can use -a flag to view all your stopped containers.
docker ps -a
To remove them from your system you’d have to use:
docker rm <container-id>/<container-name>
For example: I use these one-off containers to test out the new features from the latest release of Python by opening a Python Shell from the container.
docker run --rm -it python:3.11.0b4-alpine3.16 python

Command Substitution
Docker has some filters and flags that you can use to perform an iterative task.
Common tasks like creating new versions of the image with the same name and tag can result in dangling images. The command below shows us a list of all the dangling images in the system eating our disk space.
docker images --filter dangling=true
Now we want to remove all of them to clear up some storage! It’s not productive to remove them one by one using
docker rmi <image-name or id>
With -q flag we can list only the ids of the images and pass its output to the remove command using command substitution (supported by most SHELL)
docker rmi $(docker images -q --filter dangling=true)
NOTE: If your SHELL supports it, you can replace $(...) with back-ticks:
docker rmi `docker images -q --filter dangling=true`
Software Bill of Materials (SBOM)
If you are shipping images that are used by multiple teams or are public for use then it is essential that you publish the Software Bill of Materials (SBOM) along with your images. Software Bill of Materials provides a transparent overview of the packages that make up your final image. These can be your OS system packages, or language-specific packages, along with their version. It makes it easy for teams and end-users to identify packages on our image that are vulnerable with simple search or vulnerability scanners like grype.
There are two ways you can go about generating SBOMs for your Docker image:
Docker introduced native support for generating SBOM in Docker Desktop 4.7.0. You can also install it as a plugin.
curl -sSfL https://raw.githubusercontent.com/docker/sbom-cli-plugin/main/install.sh | sh -s --Note: that the plugin is in the Experimental stage and things are subject to change rapidly.
You can use the syft command-line tool that Docker uses internally.
Generating SBOM
You can generate SBOM in two widely used standard formats SPDX and CycloneDX or take the plain JSON route if you aren’t sure of the mentioned formats. Plain JSON has a dump of all the information syft can find in your image.
# Docker CLI
docker sbom <image-name> -o <image-name.sbom.json>
docker sbom ubuntu:latest -o ubuntu.sbom.json

# Syft CLI
syft <image-name> -o json=<image-name.sbom.json>
syft ubuntu:latest -o json=ubuntu.sbom.json
Vulnerability Scanning
Once you have the SBOM, the next step is to scan for vulnerabilities. One of the profound tools for this is grype. You can pass the SBOM JSON generated into grype to list the vulnerabilities. It will include the installed version, fixed version, and severity of the packages scanned.
grype ubuntu.sbom.json
If you want to go further you can add an SBOM to an image as an attestation using Syft and Cosign.
There are multiple tools to scan for vulnerabilities in Docker images with/without the need for SBOM, you can find these tools listed in this article by geekflare.
Always be scanning
With the introduction of Docker extensions on Docker Desktop scanning for vulnerability in your images has never been easier.
Open your Docker Desktop and go to extensions:
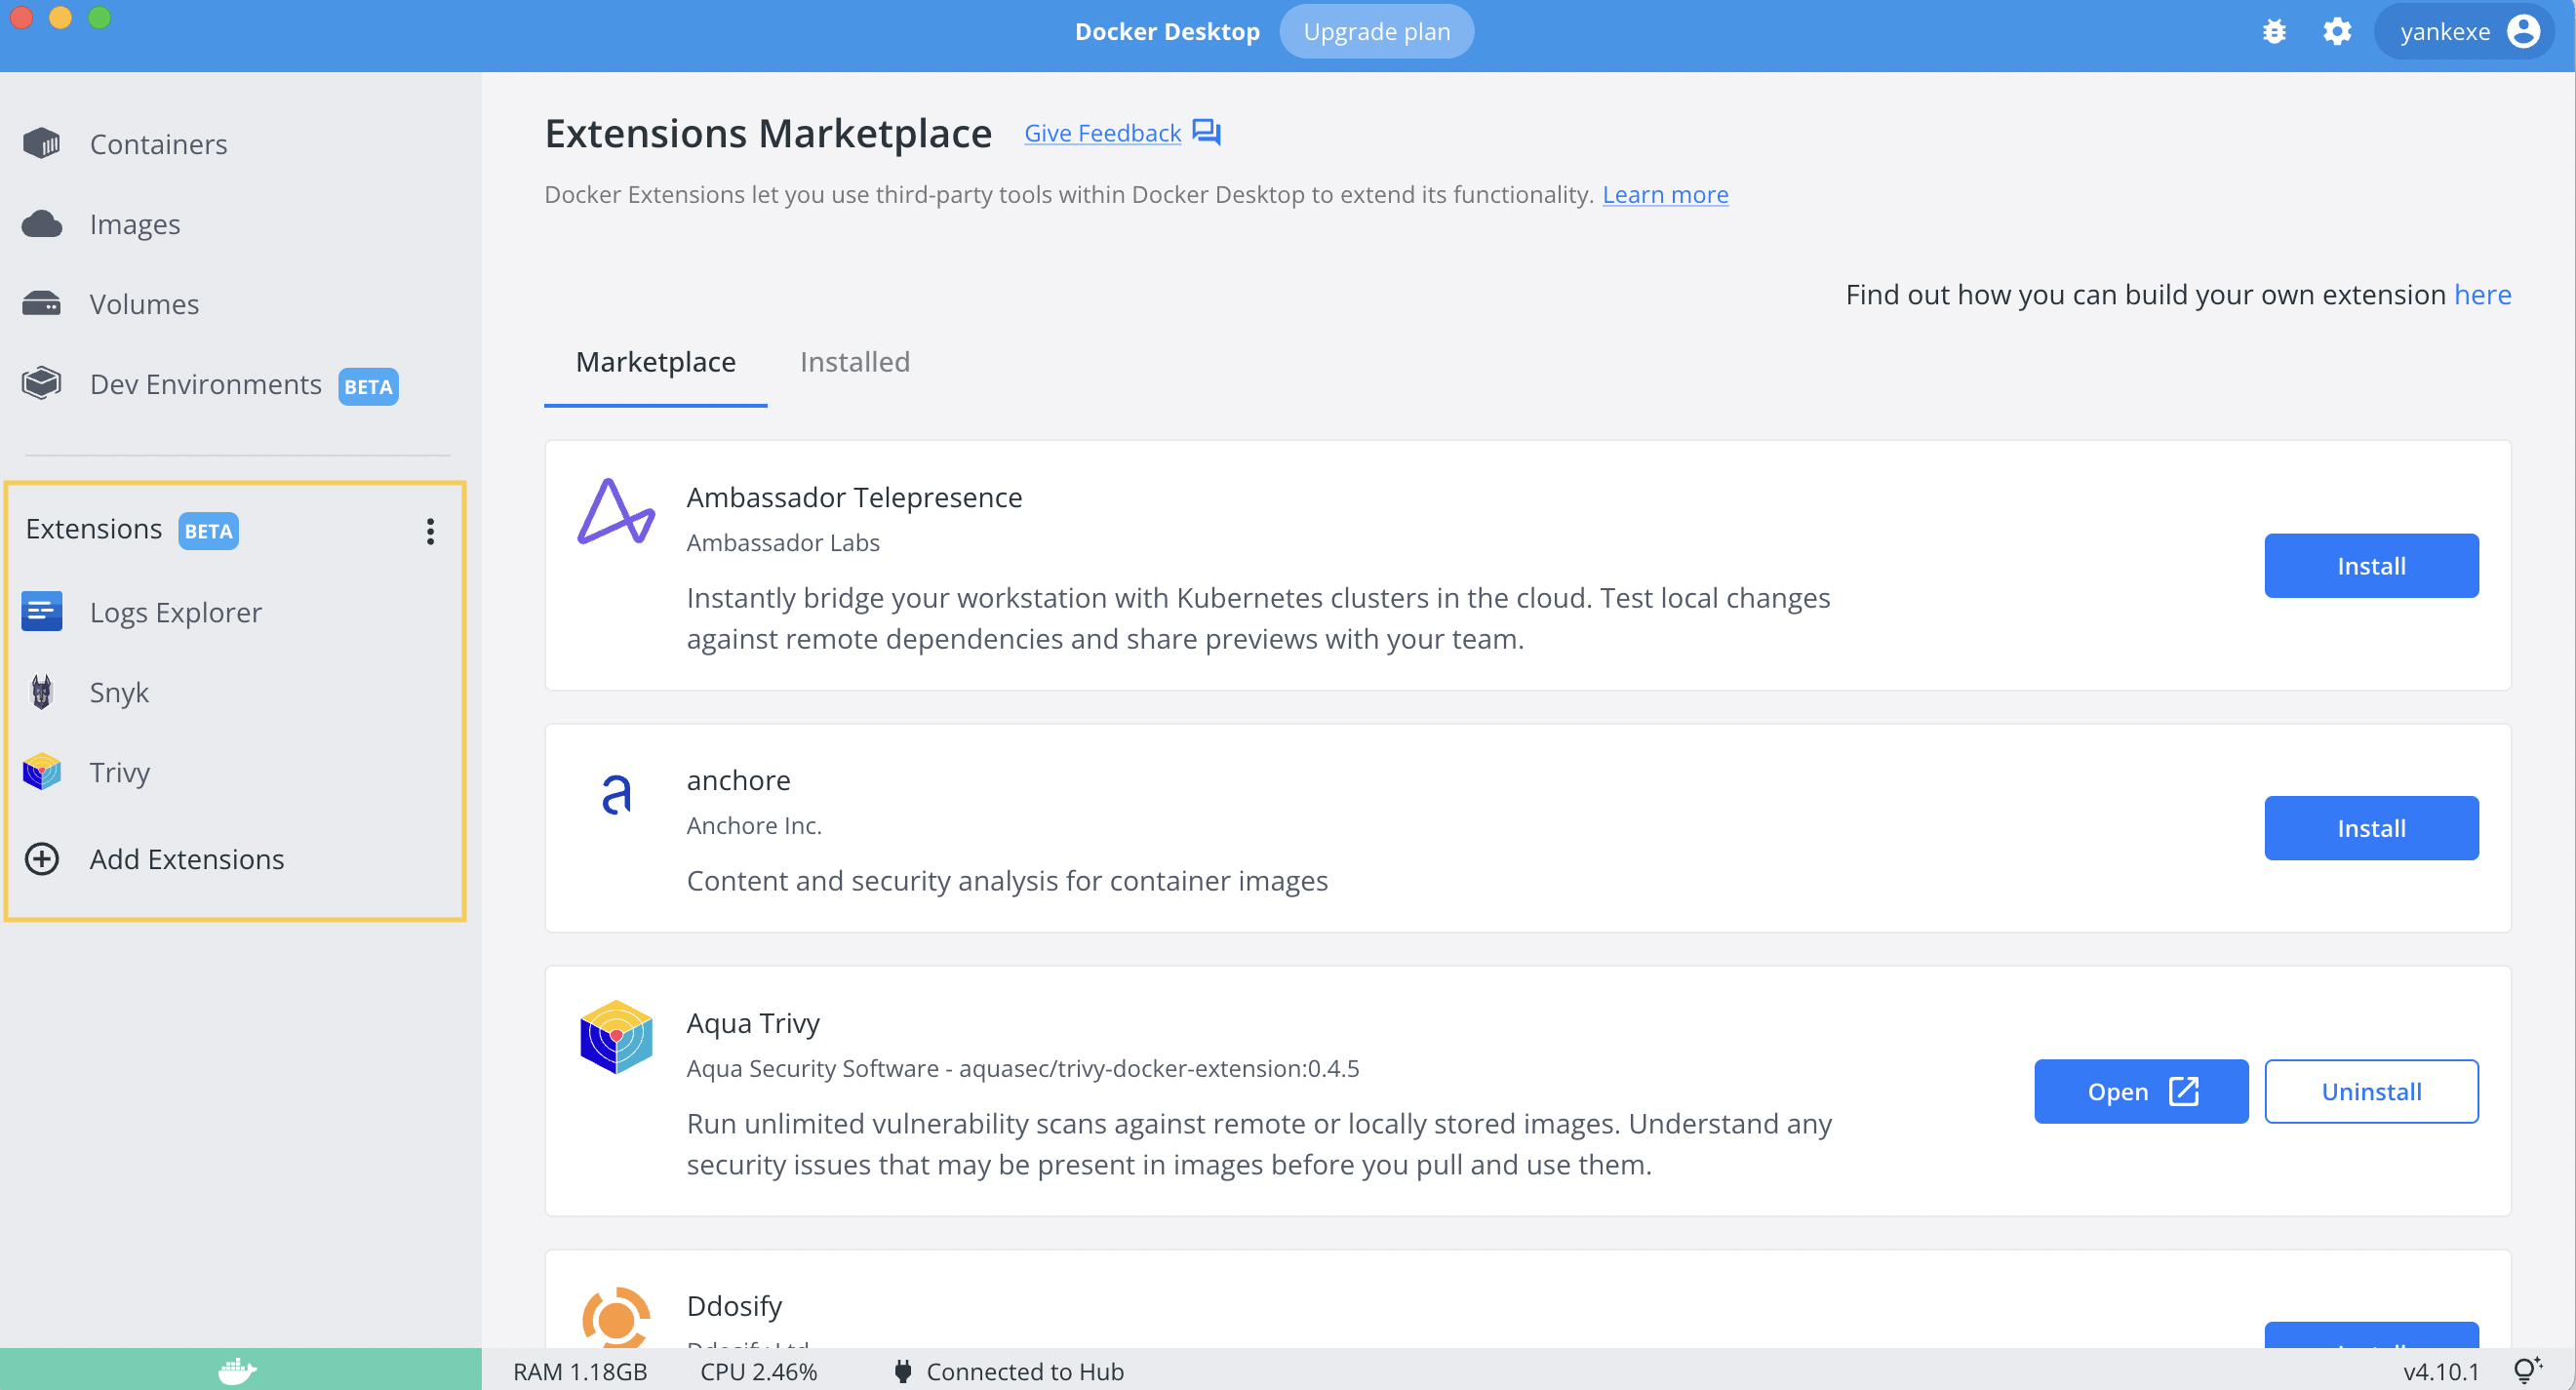
From there, you can download Snyk and Trivy. You can download their CLI's if you are not using Docker Desktop.
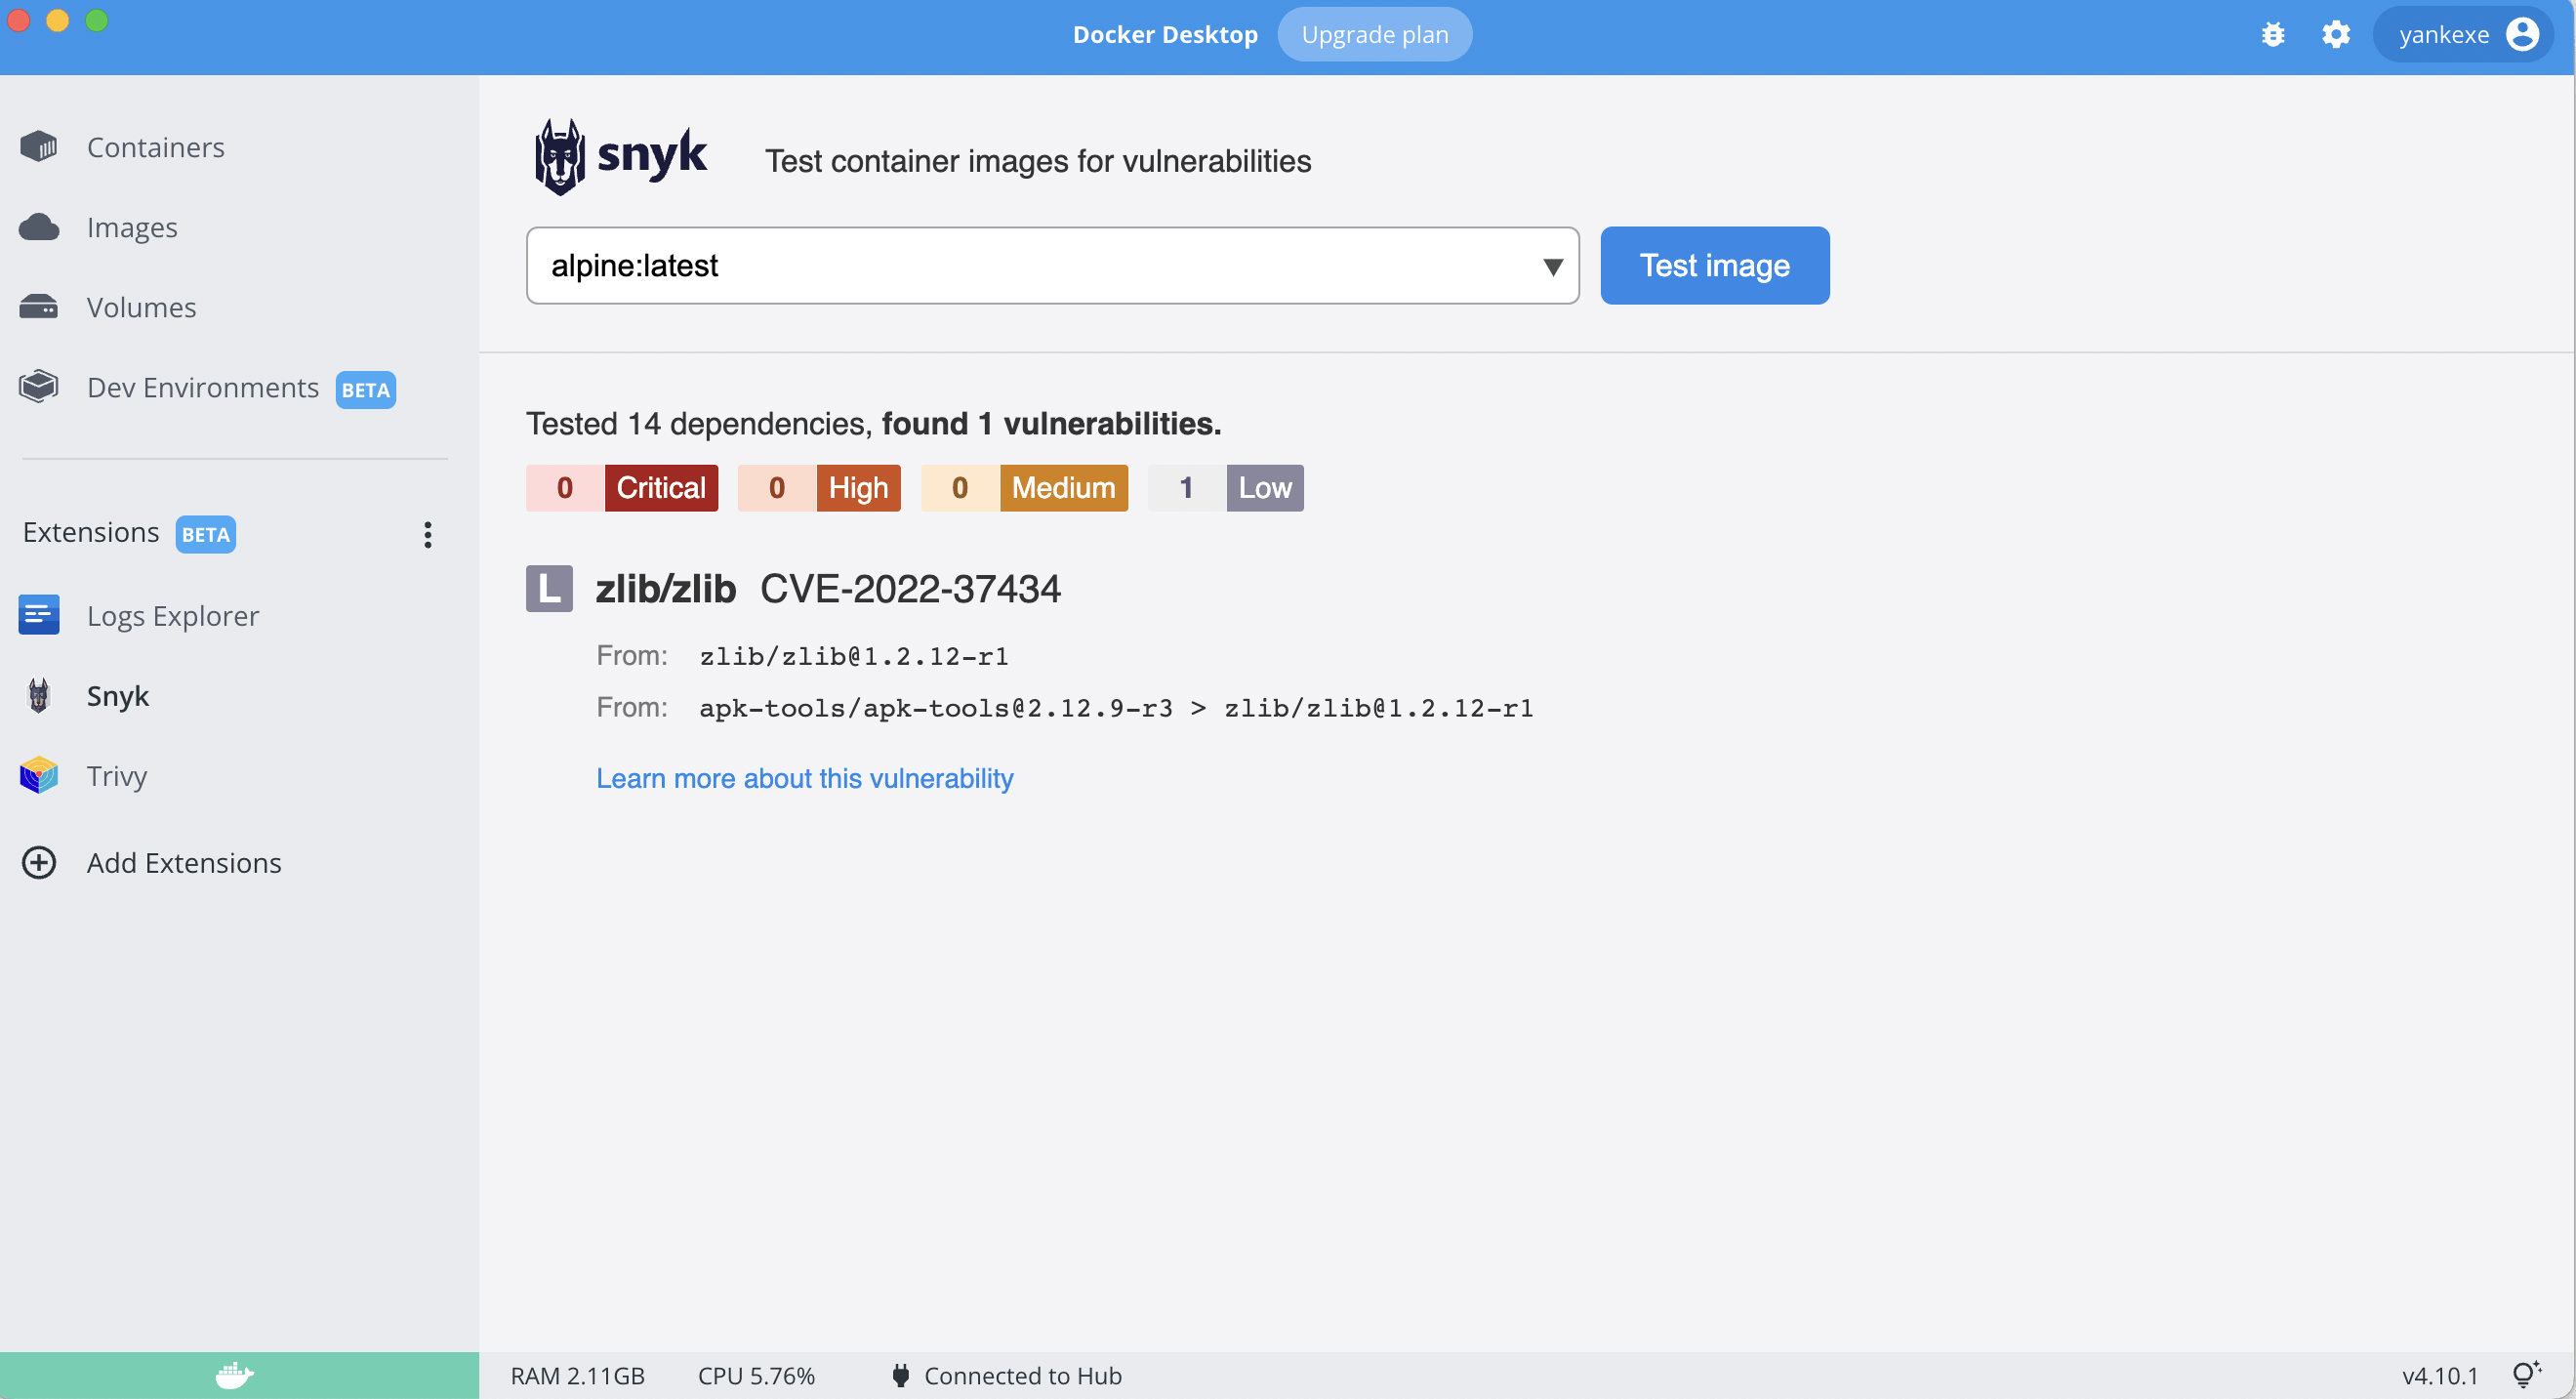
Go to one of its dashboards, select the image to scan and you’ll be provided with a list of vulnerabilities in your image.
Cross-platform Images
When you want to distribute images among your team; you have to make sure that it runs on all of the machines. That’s why we are using Docker in the first place, right?
Although Docker makes it quite easy to package your application and move around in any environment; we do have to make sure that the underlying CPU architecture supports the image we have packaged. Images are tied to the CPU architecture where it is built and it specified on the OCI Image Index properties. To view this, you can inspect your any image on your machine:
# Search for Architecture
docker image inspect busybox:latest | less
To view all the available CPU architecture for a particular image, you can run the following command:
docker buildx imagetools inspect busybox:latest
Best practice is to build these multi-platform images on your CI pipelines; for this tutorial, we will be doing it on our local machine. After we build the multi-arch images, we need to push them to the Docker Hub since the Docker engine registry only supports single CPU architecture. For this you need to authenticate your Docker CLI for Docker Hub before you proceed to the next section.
**Create a new builder: **
docker buildx create --name multi --use
Create a new test Dockerfile
FROM alpine:latest
CMD echo “Running on $(uname -a)”
Build and push to Docker Hub
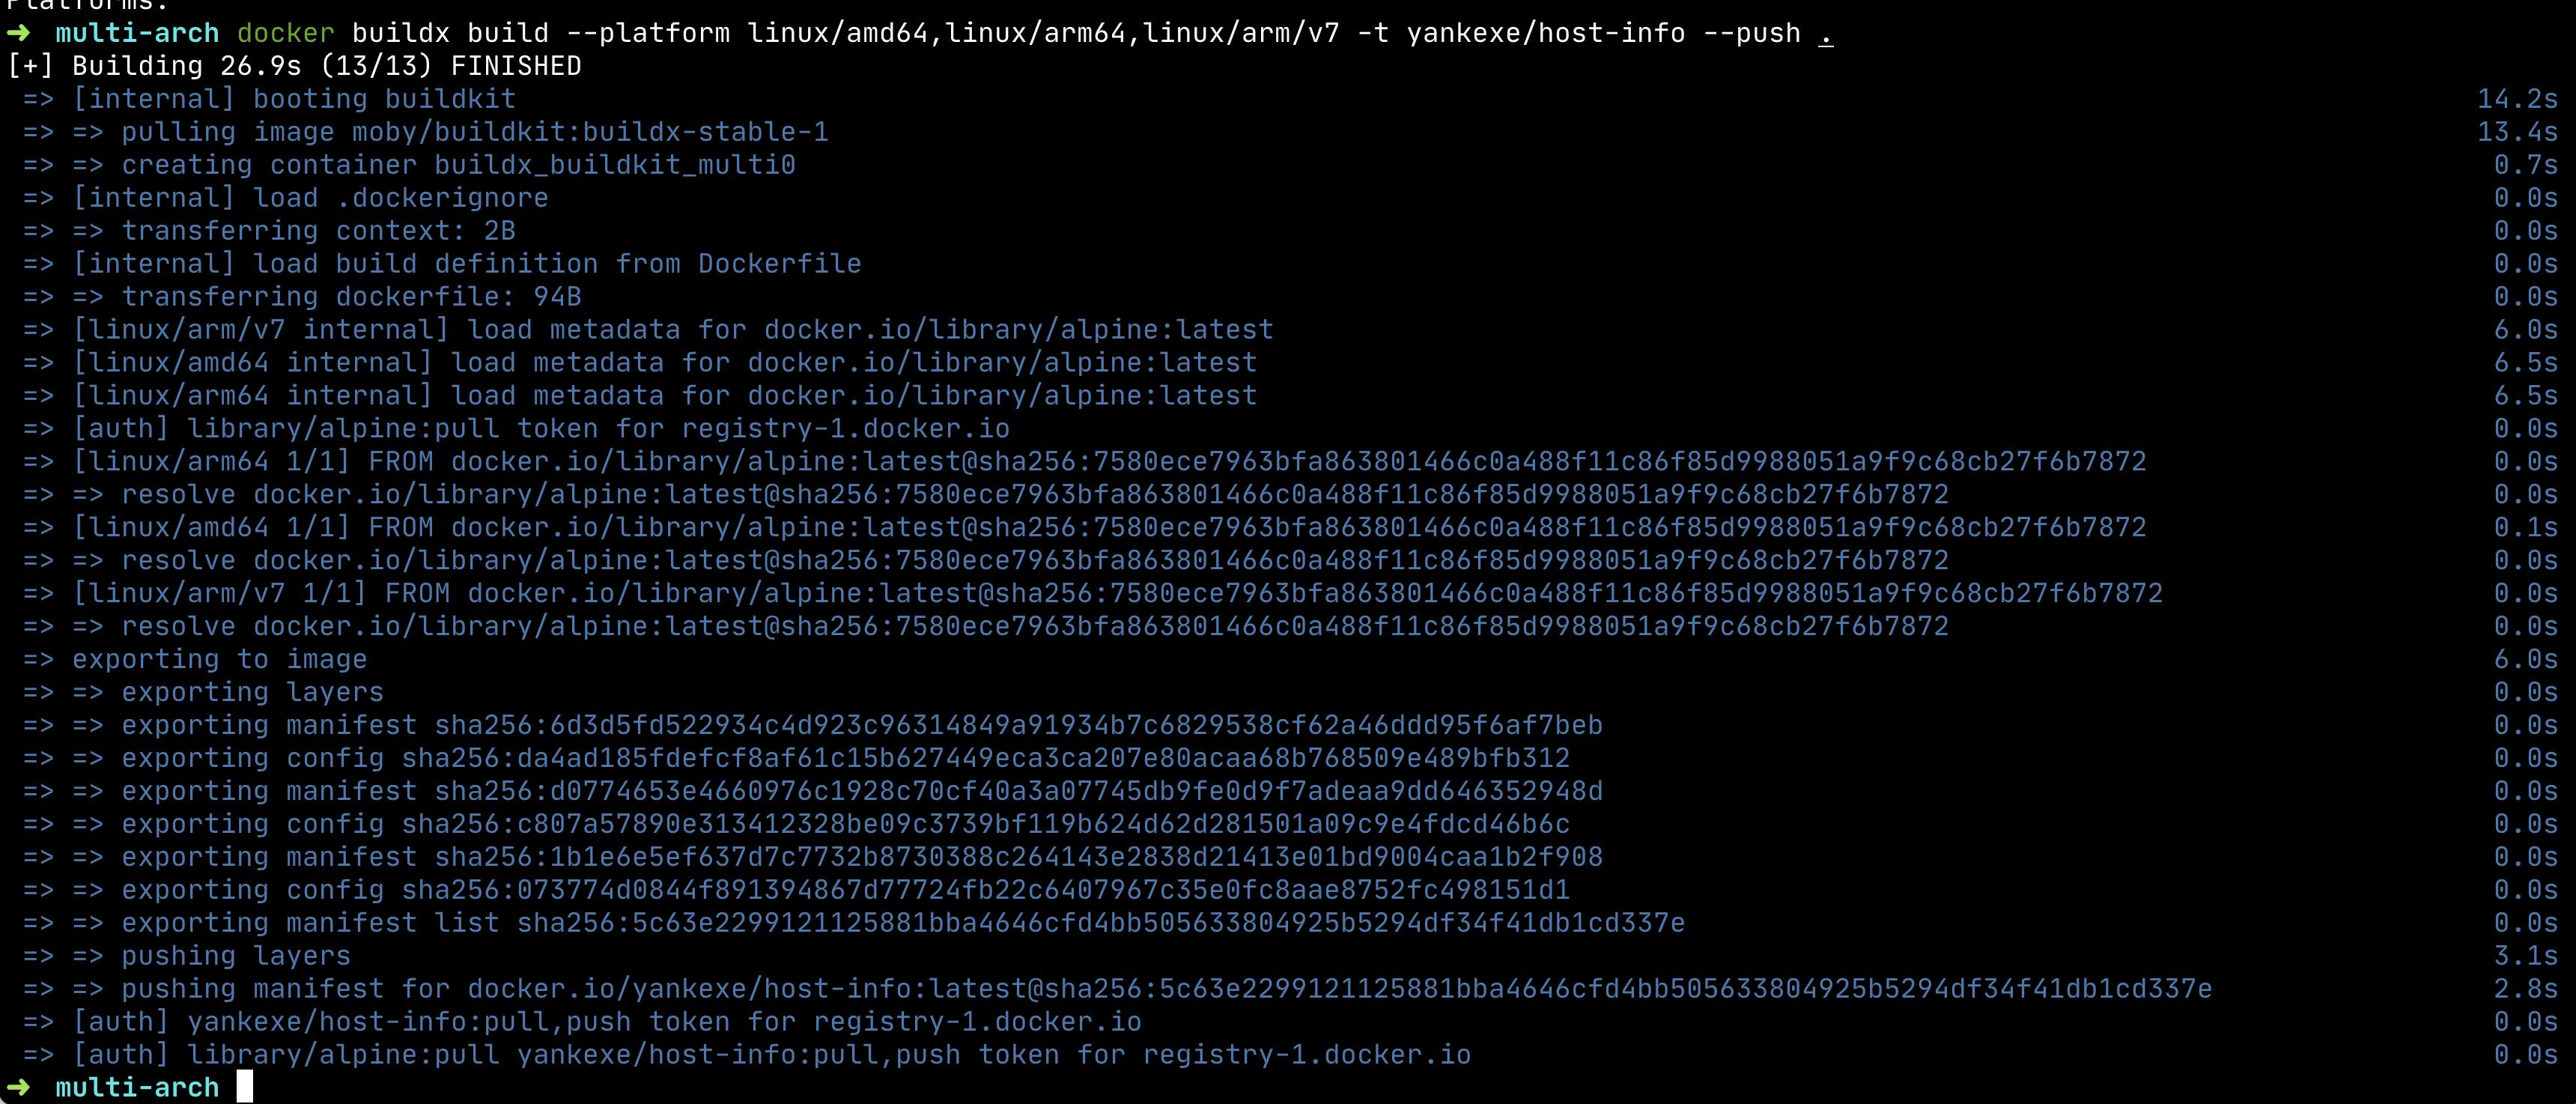
To create multi-arch images we use the --platforms flag and specify which architecture we want to build against.
docker buildx build --platform linux/amd64,linux/arm64,linux/arm/v7 -t yankexe/host-info --push .
View multi-arch images in Docker Hub
In DockerHub, we have images that can be used against multiple platforms. Now, if anyone pulls our image from the Hub, Docker CLI will fetch the one specific to their CPU architecture.

Connecting to the host machine
Publishing port using -p or —port flags to make services available outside of Docker (host machine) is common in everyone's development workflow. But what if you want to connect to a service running on your host machine from inside of the container?
For this, Docker has a built-in DNS name: host.docker.internal which resolves to the host machine IP address. Note that, this is only available on Docker for Mac and Windows.
If you have a database instance running on your host machine at port :5432 then you can access it from the application inside your container using host.docker.internal:5432
Demo
Create a simple flask server: app.py on your host machine.
from flask import Flask

app = Flask(__name__)

@app.route("/")
def index():
    return "Hello world"
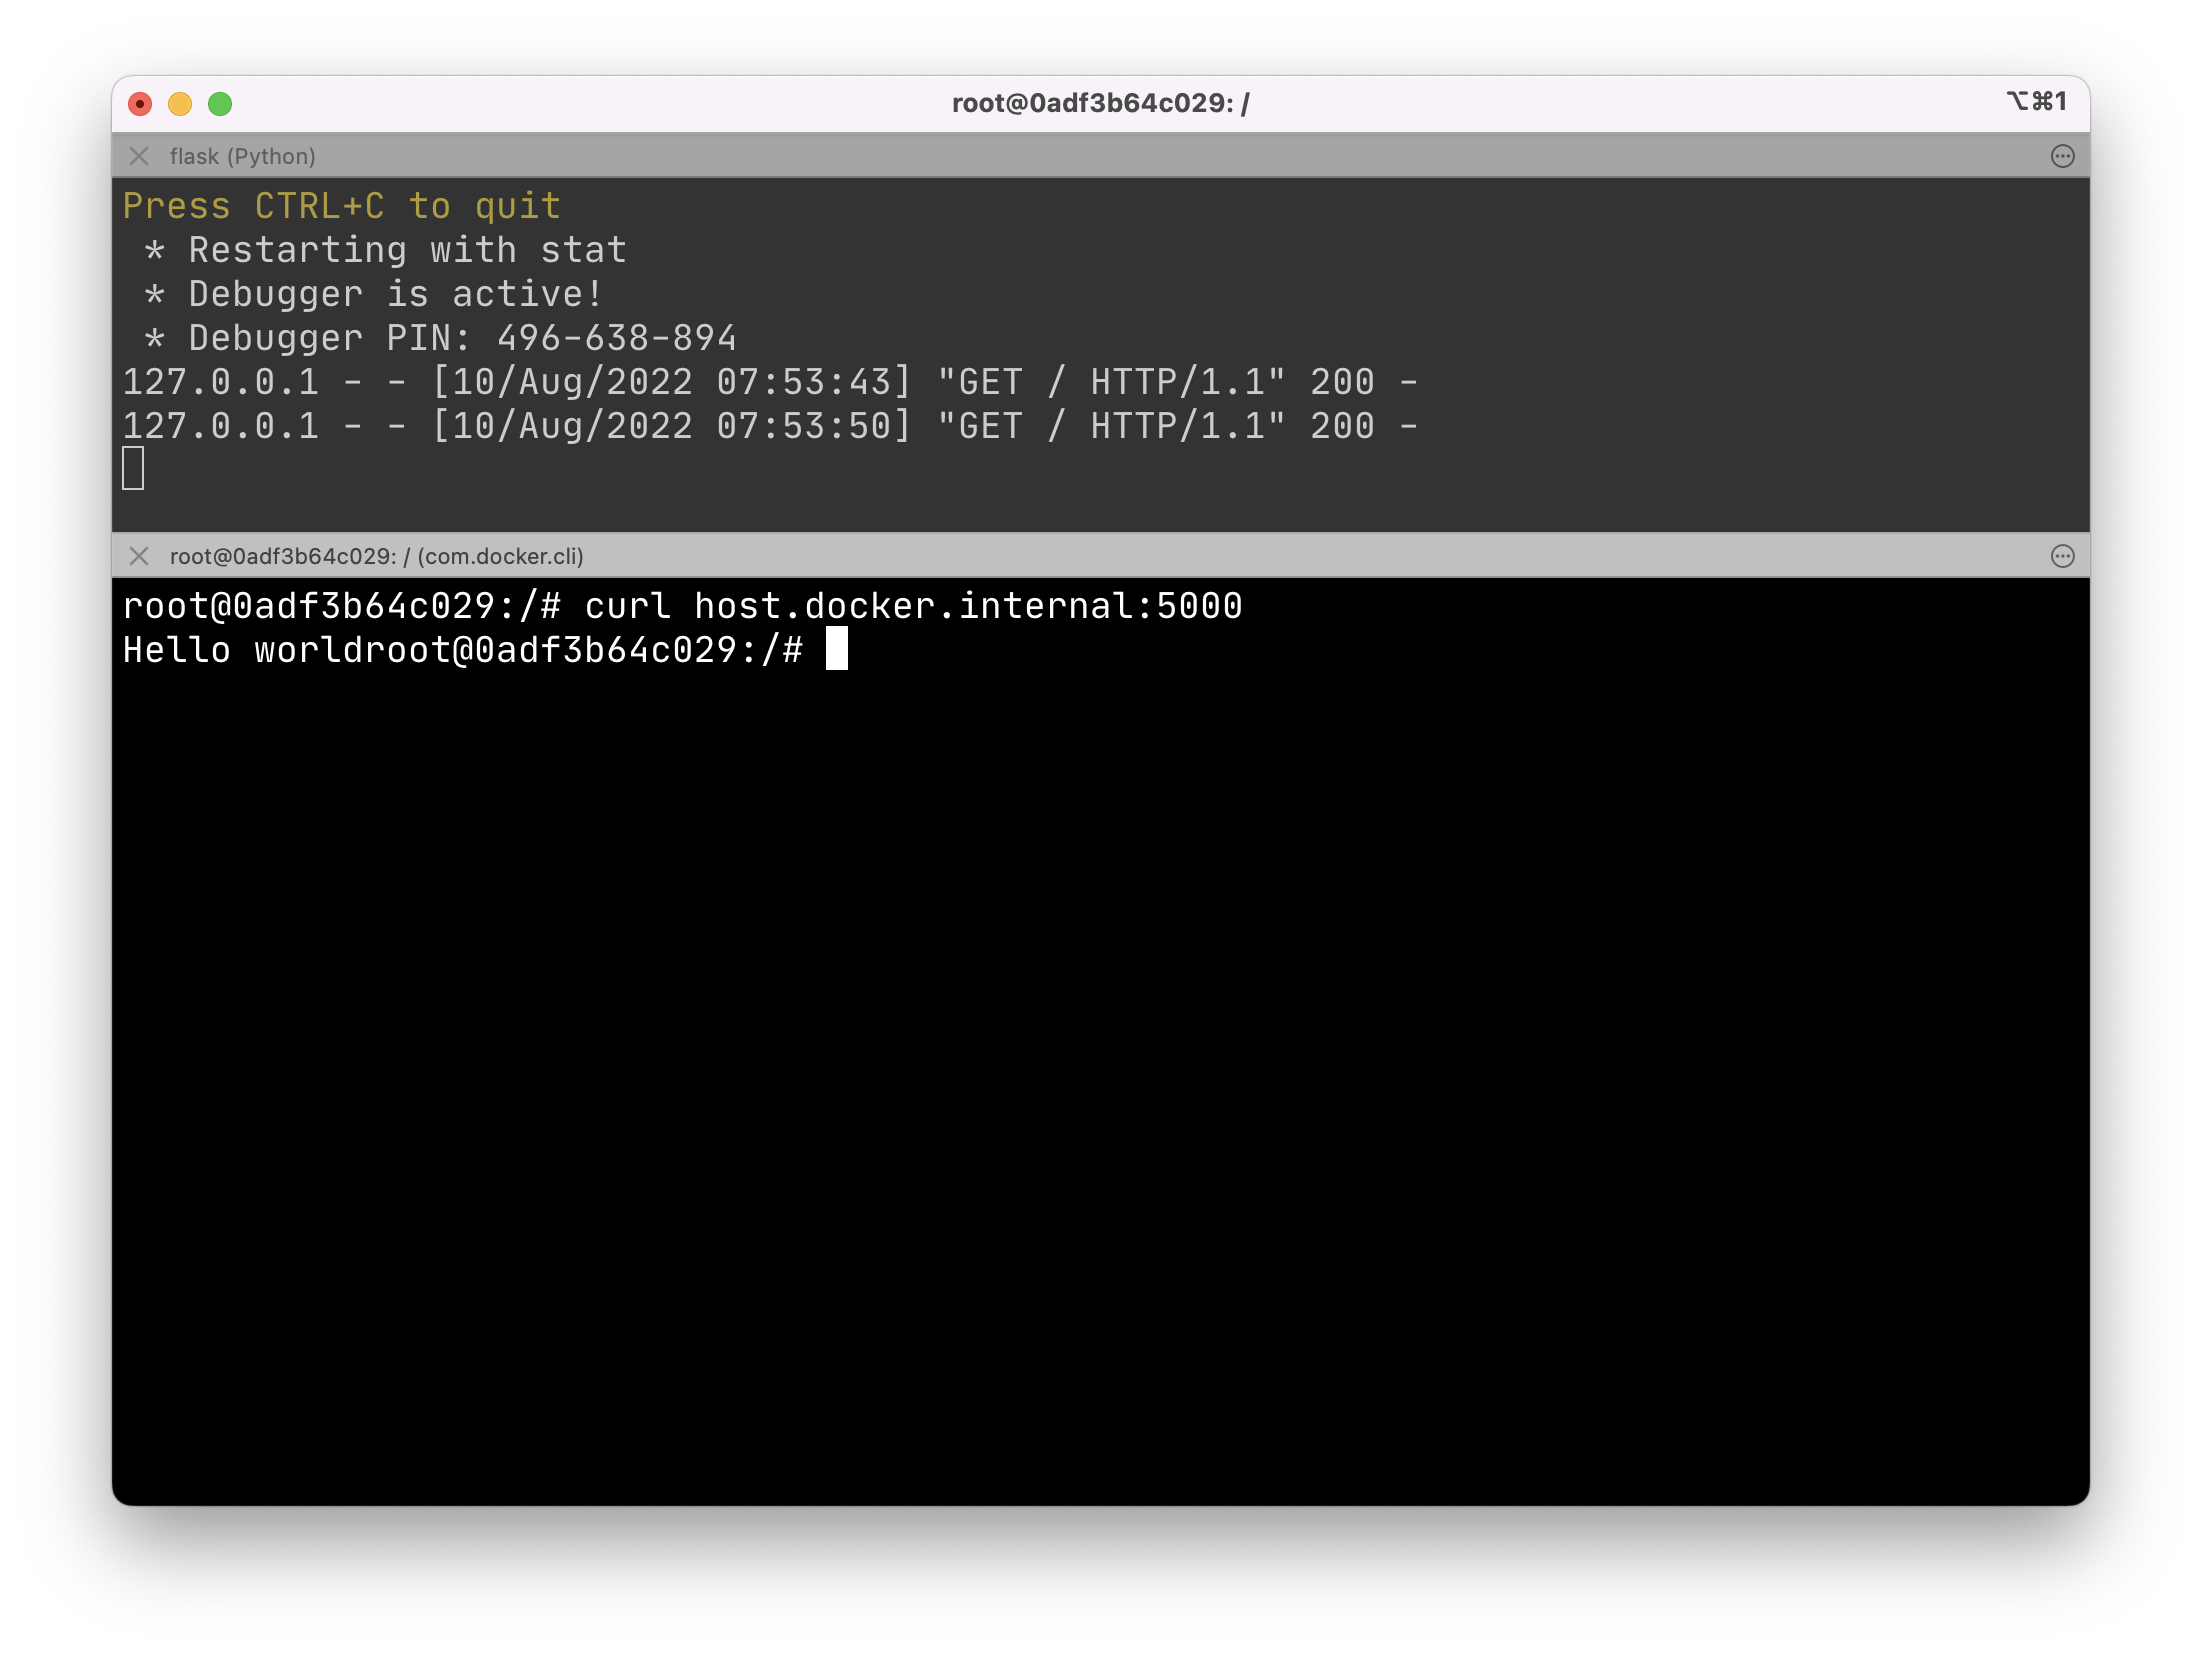
Run the server:
flask --app app --debug run
Get inside an one-off container:
docker run --rm -it ubuntu bash
Make a request from inside of the container to the host machine.
apt update; apt install curl -y
curl host.docker.internal:5000
Thank you for reading. If you have any suggestions or feedback feel free to reach out to me on Twitter.