


Deploy your Serverless Python function locally with OpenFaas in Kubernetes


We have come a long way in building distributed applications. From monoliths to Microservices we have been able to decouple and scale our applications with optimal use of the underlying hardware resources. But now we are moving towards more lightweight approach to deploy our applications; Serverless! With the inception of Function as a Service (FaaS), application modularization has been taking an ascent in the world of cloud computing.
In this blog, we will be exploring the development to deployment of our Serverless function locally.
The beauty of OpenFaas and KinD is that you don’t need to deploy your functions to cloud to test them, you can run them locally!
Prerequisite:
You just need to have Docker installed on your machine. The rest we will setup as we go along. We will be installing a few tools so bear with me. 🐻
OpenFaas? 🐬
OpenFaas is an awesome tool/framework developed by Alex Ellis with the Open Source community that helps to deploy burstable functions and microservices to Kubernetes without repetitive, boiler-plate coding.
It was built with developer experience in mind creating a low barrier of entry to the Kubernetes ecosystem. It comes with it’s own cli-tool called the faas-cli which makes a clever use of templates and makes pushing docker images and deployment of containers a breeze. And once deployed it takes care of auto-scaling and auto-provisioning based on the network traffic.
With all the overhead being handled by OpenFaas, all you have to do is focus on writing your function. But in our case we have some setting up to do 👨🏭
Properties of functions:
Here are few things to keep in mind when you are creating a function.
A rule of thumb is to make your function stateless.
Function should be atomic (single responsibility).
It should be idempotent.
Trigger to the function could be TCP or event, however effect must be an event.
Let’s get started! 🚀
Install arkade
arkade will be our one stop tool to install and deploy apps and services to Kubernetes. Think of this tool as a package manager like apt or pacman. We will be needing a bunch of CLI utilities to get up and running.
Make sure you install this if you have never set up a Kubernetes tooling in your system.
$ curl -sLS https://dl.get-arkade.dev | sudo sh
Just to make things clear:
use arkade get to download cli tools and applications related to Kubernetes.
use arkade install to install Kubernetes applications using helm charts or vanilla
yamlfiles.
Install kubectl
kubectl is a command line tool that talks to the Kubernetes Master Controller API for performing actions on our cluster.
$ arkade get kubectl

# follow the instructions on the screen.
Creating a local Kubernetes cluster 🧱
We will be deploying our function on a local Kubernetes cluster so let’s set that up. We will be using a tool called KinD(Kubernetes in Docker) for this.
Unlike Minikube which requires VM; KinD utilizes Docker container to deploy your cluster. It is comparatively faster.
Install KinD
Our goal is to keep everything local so we will be creating a local Docker registry (Dockerhub for your local machine). KinD provides a shell script to create a Kubernetes cluster along with local Docker registry enabled.
#!/bin/sh
set -o errexit

# create registry container unless it already exists
reg_name='kind-registry'
reg_port='5000'
running="$(docker inspect -f '{{.State.Running}}' "${reg_name}" 2>/dev/null || true)"
if [ "${running}" != 'true' ]; then
  docker run \
    -d --restart=always -p "${reg_port}:5000" --name "${reg_name}" \
    registry:2
fi

# create a cluster with the local registry enabled in containerd
cat <<EOF | kind create cluster --config=-
kind: Cluster
apiVersion: kind.x-k8s.io/v1alpha4
containerdConfigPatches:
- |-
  [plugins."io.containerd.grpc.v1.cri".registry.mirrors."localhost:${reg_port}"]
    endpoint = ["http://${reg_name}:${reg_port}"]
EOF

# connect the registry to the cluster network
docker network connect "kind" "${reg_name}"

# tell https://tilt.dev to use the registry
# https://docs.tilt.dev/choosing_clusters.html#discovering-the-registry
for node in $(kind get nodes); do
  kubectl annotate node "${node}" "kind.x-k8s.io/registry=localhost:${reg_port}";
done
Once you have the file on your local machine. Run the following command to make it executable.
$ chmod +x kind-with-registry.sh
Now you can run the script to create your local Kubernetes cluster with local Docker registry.
$ ./kind-with-registry.sh
To make sure the kubectl context is set to the newly created cluster; run:
$ kubectl config current-context
If the result is not kind-kind; then run:
$ kubectl config use kind-kind
Make sure your cluster is running:
$ kubectl cluster-info
Make sure Docker registry is running.
$ docker logs -f kind-registry
OR
$ docker ps -l
Deploying OpenFaas to KinD cluster
Now that we have our local Kubernetes cluster up and running lets deploy our OpenFaas services to support our functions.
$ arkade install openfaas
Make sure OpenFaas is deployed. It might take a minute or two.
$ kubectl get pods -n openfaas
Templates📂
Before we move to creating our function, it is essential to understand the concept of templates in OpenFaas.
What are templates?
Templates are basically a wrapper for your functions. Same template can be used for multiple functions.
OpenFaas already provides a variety of templates for different programming languages to start with.
There are two type of templates based on the webserver :
classic watchdog which uses template format from here.
of-watchdog which uses template format from here.
Watchdogs are basically webservers to proxy request to our functions.
We will be using the templates that supports the latest of-watchdog. You can read more about OpenFaas watchdog.
The most important piece in the templates directory is the Dockerfile, it drives everything from your watchdog to how and where your function gets placed in the template. You can also create your own template based on the need of your function.
Pull the template from store:
# list all the templates
$ faas-cli template store list

# pull python3-flask template from store
$ faas-cli template store pull python3-flask
This will pull all the templates for python from OpenFaas store to your template directory of your project folder. We will be using the python3-flask-debian template. You can ignore rest of the templates or delete them.
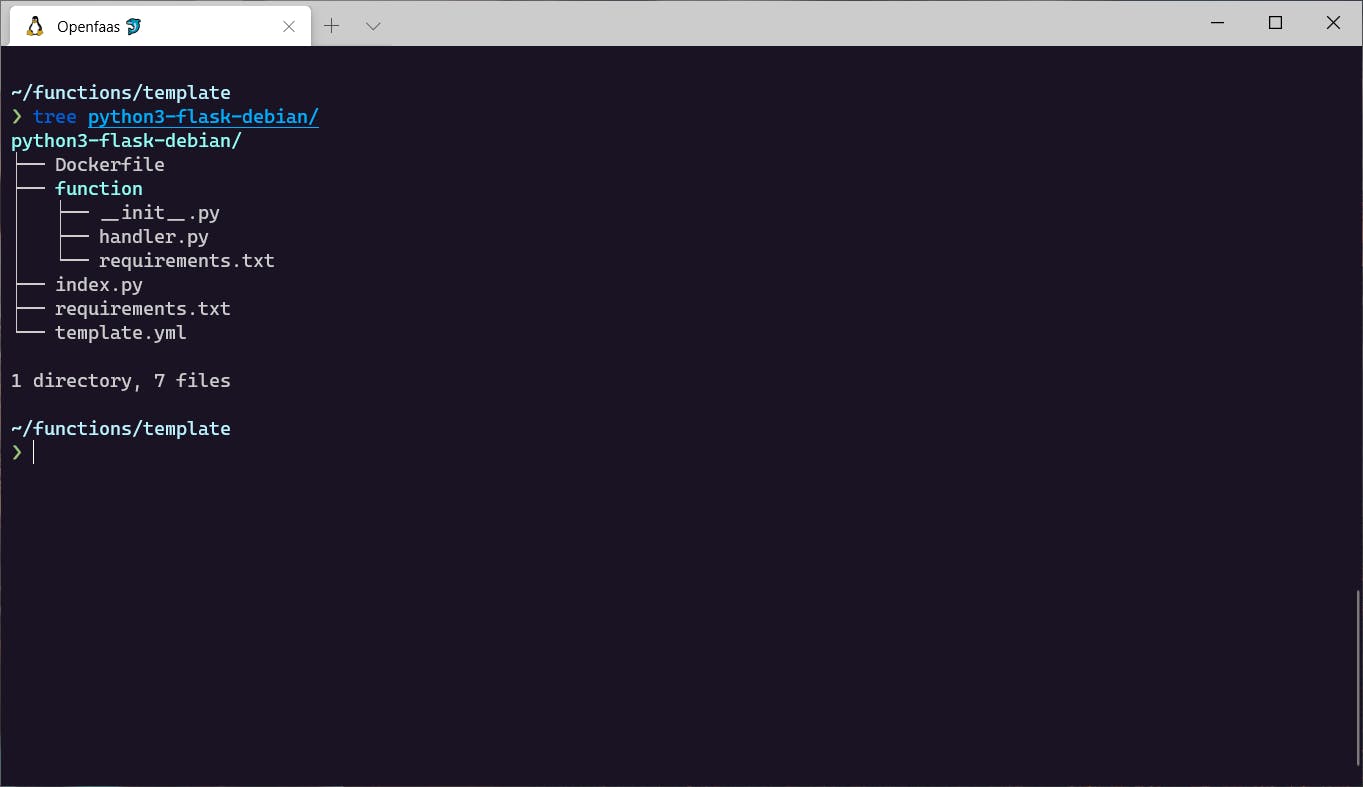 Openfaas template structure.
Shown above is the basic template structure for all languages.
Template structure explanation:
index.pyis an entrypoint to our Flask application.requirements.txton the root project directory contains dependencies for our Flask application. It contains Flask and waitress (WSGI).template.ymlcontains the deployment specific configurations.requirements.txtinside of the function directory is for the function specific dependencies.Dockerfilecontains the instructions to build image for our function.
Building our function 🔨
Now it’s time to create our Serverless function.
We’ll keep the scope really small and build a simple dictionary function that returns the meaning of words you query. For this we will be using the PyDictionary module.
Since we have our template in place, we can utilize it to scaffold our function. You may have noticed the function directory and template.yml file inside our python3-flask-debian template folder earlier. We can leverage that to create our new function using the faas-cli.
$ faas-cli new <function-name> --lang <template-name>

$ faas-cli new pydict --lang python3-flask-debian
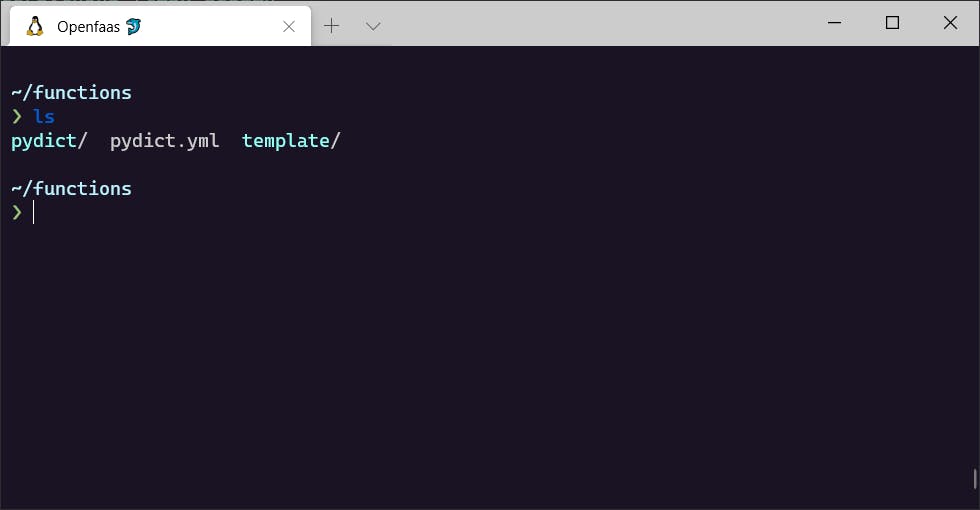
This will create a folder with the function name(pydict) along with the contents we saw earlier inside the templates function folder, plus a yaml file with the function name(pydict).
Let’s add our dependency to the requirements.txt file of function folder.
PyDictionary==2.0.1
Update the handler.py with the following code.
from PyDictionary import PyDictionary

dictionary = PyDictionary()

def handle(word):
    return dictionary.meaning(word)
Our function is complete. ✔
Openfaas YAML configuration 📄
A Kubernetes guide won’t be complete without talking about YAML files. They are necessary to describe the state of our deployments. faas-cli has already created a yaml file for our function, namely, pydict.yml
This file will tell the faas-cli about the functions and images we want to deploy, language templates we want to use, scaling factor, and other configurations.
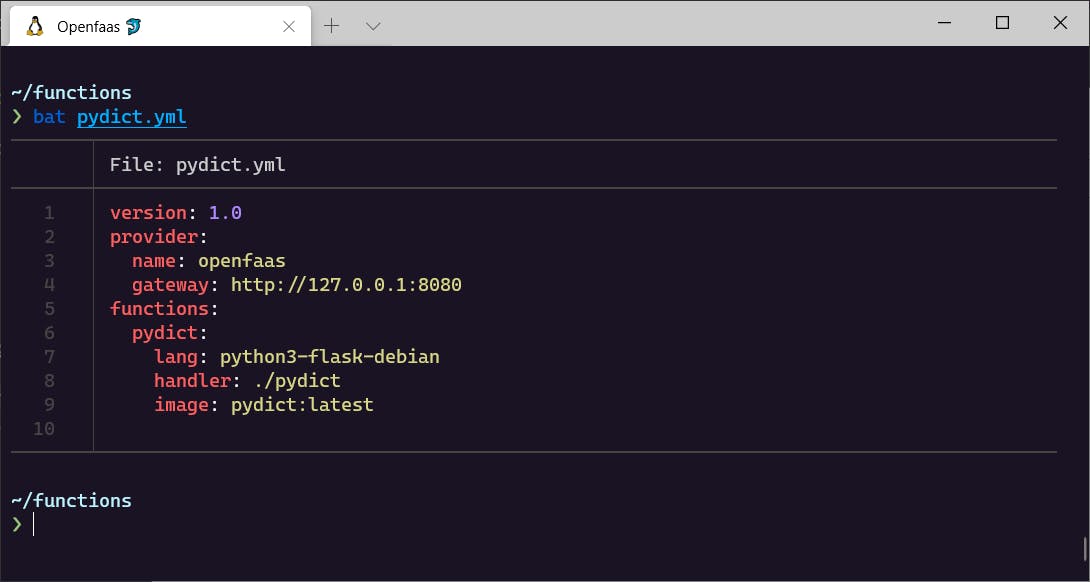 contents of pydict.yml
YAML file breakdown
gateway: determines the IP address to connect to the OpenFaas service. Since we are testing it locally the gateway provided by default is fine. Note: if we were deploying on managed cloud: we will take the IP address ofgateway-externalUnder
functions: we can register different Serverless functions we want to deploy along with their configuration.lang: name of the language template the function uses.handler: location of our Serverless function.image: fully qualified docker registry URL along with image name and tag.
Since we are using Local registry we have to change the image tag to incorporate it. Change value of image to the following:
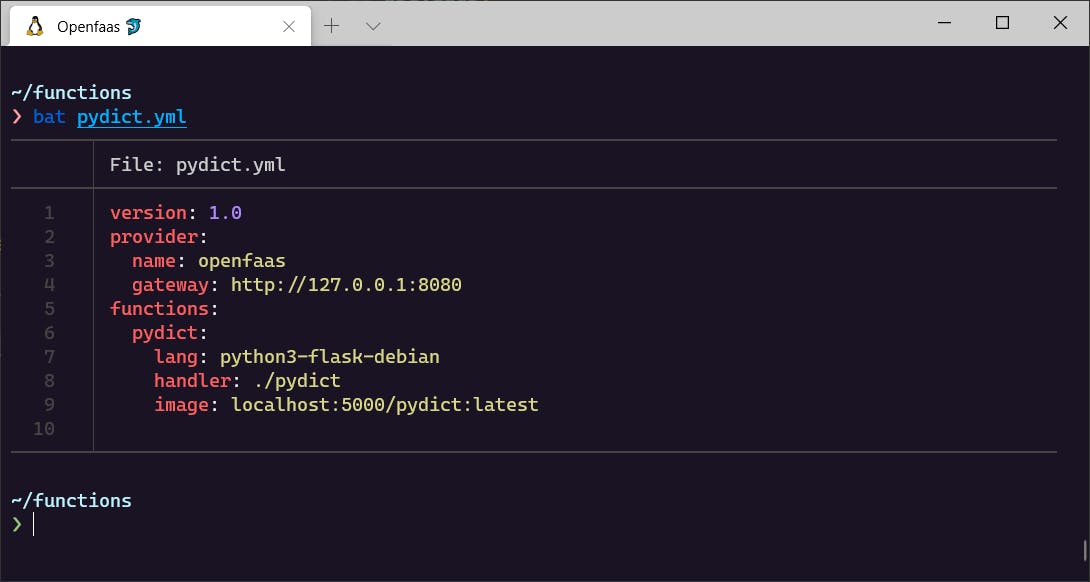 Change image tag to use local container registry
Port-forward to Localhost ⏩
Now, we need to port-forward the OpenFaas gateway service to our localhost port. Remember the gateway on our yaml file?
To check the gateway of OpenFaas service; run:
$ kubectl get service -n openfaas
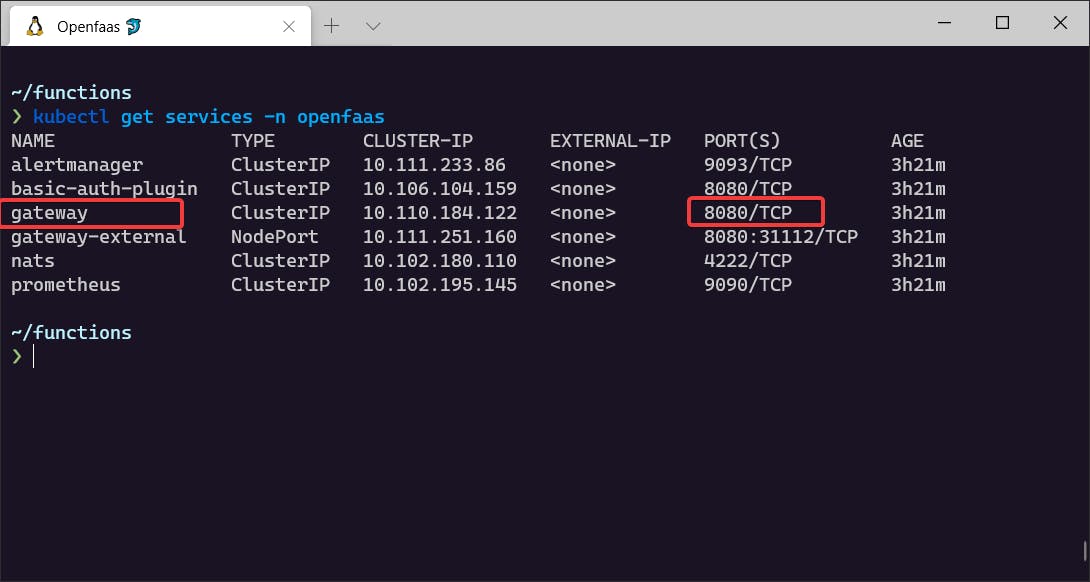
$ kubectl port-forward -n openfaas svc/gateway 8080:8080
Although the the cluster is deployed locally, internally Kubernetes manages it’s own IP addresses. We are port forwarding to access the service inside the Kubernetes cluster from our local machine. Once that is done, open a new terminal window, and prepare for take off!
Build ➡Push ➡Deploy 🚀
We have most of the setup ready; now we can build our image, push it to the registry, and deploy it to Kubernetes.
Build our image
$ faas-cli build -f pydict.yml
Push our image to the local registry
$ faas-cli push -f pydict.yml
Now to deploy the function to the cluster; we need to login to faas-cli Let’s generate credentials for authentication.
Generate password:
$ PASSWORD=$(kubectl get secret -n openfaas basic-auth -o jsonpath="{.data.basic-auth-password}" | base64 --decode; echo)
Check if password exists:
$ env | grep PASSWORD
Now, login to faas-cli :
$ echo -n $PASSWORD | faas-cli login --username admin --password-stdin
Time for deployment:
$ faas-cli deploy -f pydict.yml -g http://127.0.0.1:8080
Check if our deployment has been successful.
$ kubectl get pods -n openfaas-fn
Testing our function 👨🔬
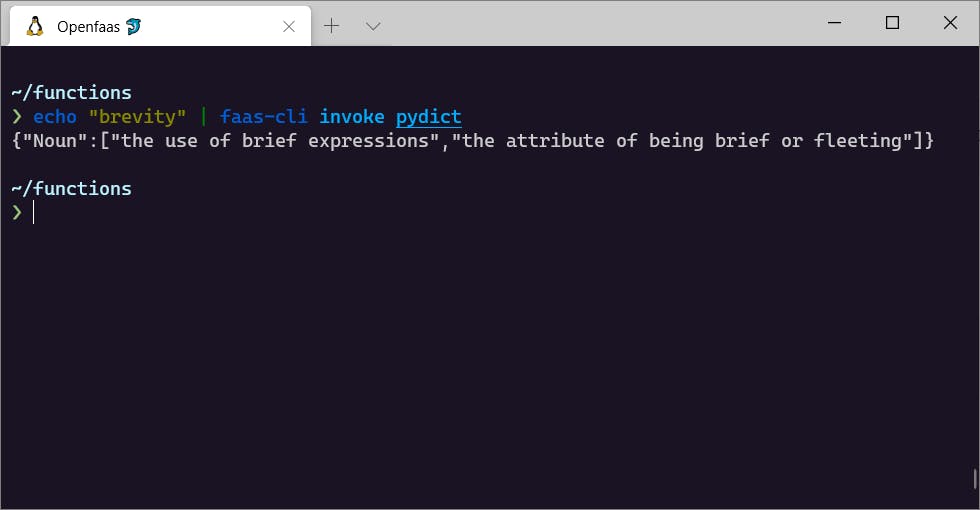
Test using CLI
We can invoke our function from CL I to get the result.
$ echo "brevity" | faas-cli invoke pydict
Test using Openfaas Portal
OpenFaas also comes with a neat UI portal to invoke our function.
Navigate to localhost:8080 in your browser. A prompt will ask you for username and password. Use admin for username and for password check the password we generated earlier. In case you forgot, you can always repeat the earlier command, i.e.
PASSWORD=$(kubectl get secret -n openfaas basic-auth -o jsonpath="{.data.basic-auth-password}" | base64 --decode; echo) && echo $PASSWORD
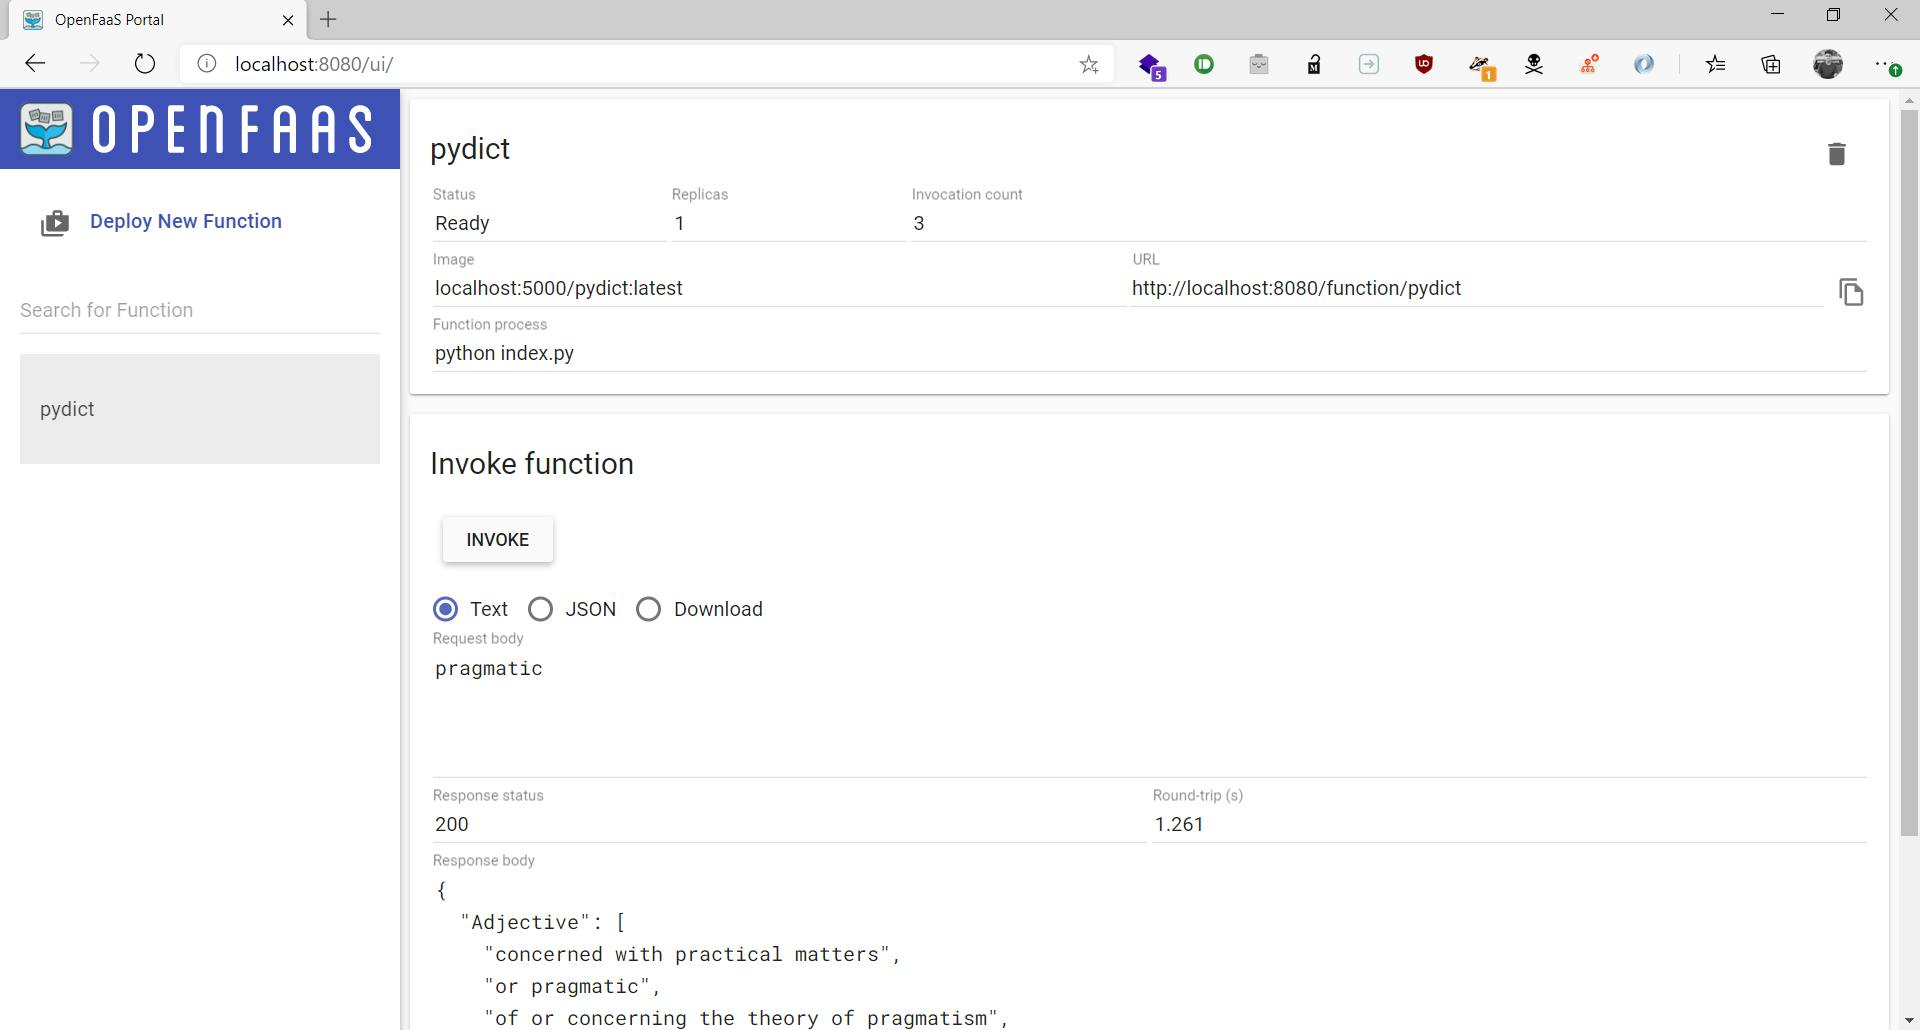 OpenFaas UI
Build more functions 🔨
Now that you have your cluster deployed with OpenFaas, you can create function with ease and deploy them. If you want to create a new function, all you have to do is:
scaffold a new function using
faas-cli newwrite your function
faas-cli up -f <config-yaml-file>
faas-cli up is a shortcut for build, push and deploy command.
Conclusion
Hope this has been a helpful guide in learning how to use OpenFaas for Serverless deployment. If you have any queries or suggestions, let’s talk in the comment section or you can DM me on Twitter.
Check out example functions on GitHub