Streamlining EC2 Access with AWS Session Manager and Port Forwarding: An In-Depth Guide

Backend Engineer 🚀 Cloud Native Enthusiast ☁
EC2 is one of the fundamental services provided by AWS and used by many who come across the platform. This compute service has applications that extend far and wide depending on the use cases.
One of the basic tasks, we do with EC2 is SSH into it, to “do stuff”. This article revolves around the very topic of accessing the EC2 instance via SSH.
Conventional Way
A private Key is required whenever you want to establish a connection between your machine and the EC2 instance. It’s an accepted standard practice that has been used for many years to connect to a remote machine. But using a private key comes with its baggage.
What if:
you lose your keys
delete your keys
someone steals your keys
you don’t know who has access to your keys (this bothers me)
Every one of us is susceptible to the above scenarios. And it brings chaos, confusion, and vulnerability when you just want to perform your task.
Access to your keys means access to your machine. If you are distributing the keys to multiple team members or using multiple keys so that they can connect and perform some action, then it immediately becomes a problem. You are entrusting the access and security of your workload that spreads across different machines, regions and god knows where. Also, logging becomes a hassle to get visibility into what users are doing on the system.
Also, SSH-ing in itself is a tedious task:
you have to assign an elastic IP address so you are always connecting to the same public IP address.
add a port for SSH to the Security Group and expose it to the world or a part of it.
enter a long command or configure ssh config
make sure private keys are in a secure location on your machine
Example of a command for ssh-ing into an EC2 instance.
ssh -i "private_key.pem" username@<ip-address>.<region>.compute.amazonaws.com
AWS Session Manager: The modern secure way
Well, I am not the only one talking about all of the issues above. It’s faced by the development, DevOps, and security teams across different organizations. When it comes to security, AWS made sure it is providing the right set of tools, mostly an intuitive one to make all of the aforementioned issues go away.
AWS Session Manager is a one-stop service that should always be used with your EC2 instance. It immediately shows its benefits upfront:
no need for private keys 🙌
provide access directly to IAM users with fine-grained policies 🔐
no need to expose SSH ports on Security Groups ✨
no need for an elastic IP address 🎉
centralized logging with direct access to CloudWatch, S3 🪵
and most importantly, an intuitive command to connect to an instance 🌟
Example of a command for connecting to an EC2 instance.
aws ssm start-session --target <instance-id>
Setting up Session Manager with EC2
Setting up Session Manager with EC2 is an effortless process. There is one extra step before we launch any new instances.
Create a new Role that allows access from Session Manager to the EC2 instance.
Go to IAM → Roles

Select the
AmazonSSMManagedInstanceCorepolicy
Name it anything that makes sense, I will name it as SSMInstanceCore.
Now that we have a Role, let’s create a new EC2 instance and attach it to it.
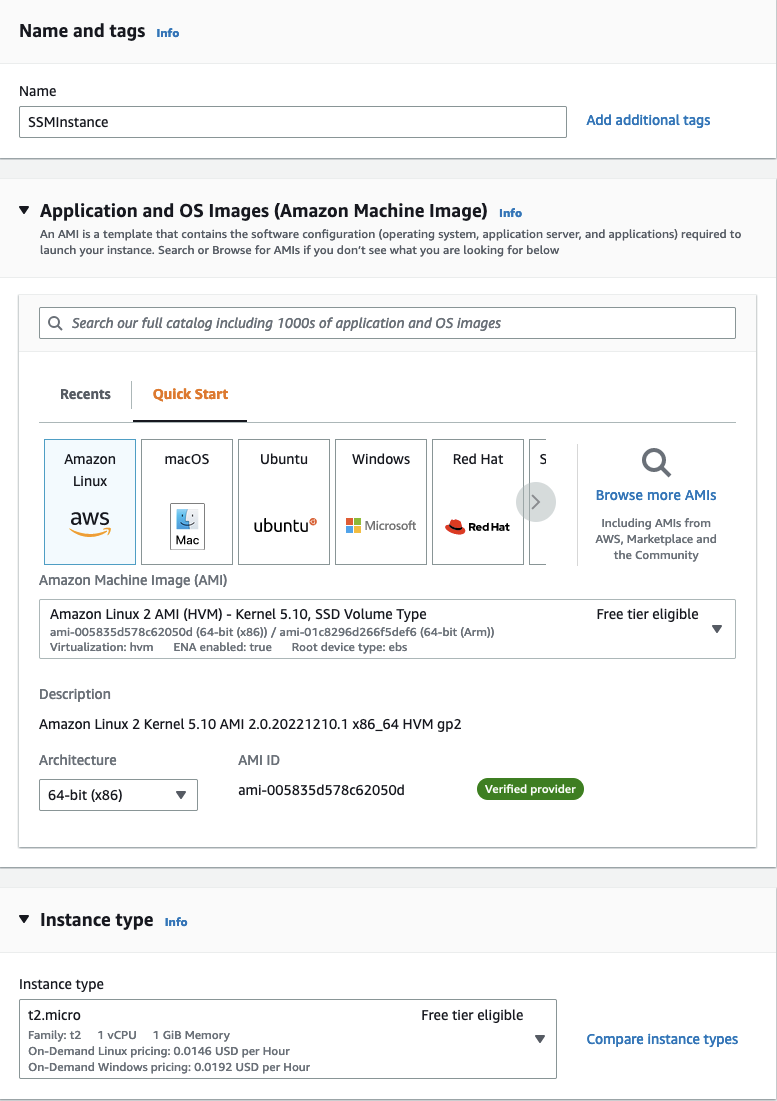
Click on Launch Instances

Give your instance a relatable name.
I will choose the default Amazon Linux 2 AMI and Instance type (it selects the free tier by default).
Finally, in the Key Pair section, choose
Proceed without a key pair⚡️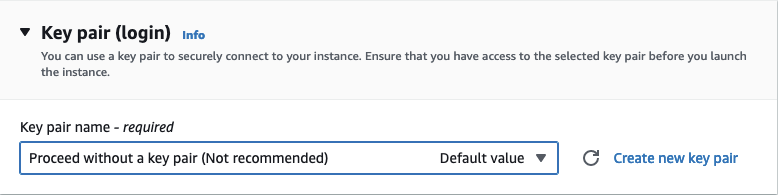
On
Network Settingsyou can name your security group and keep it empty.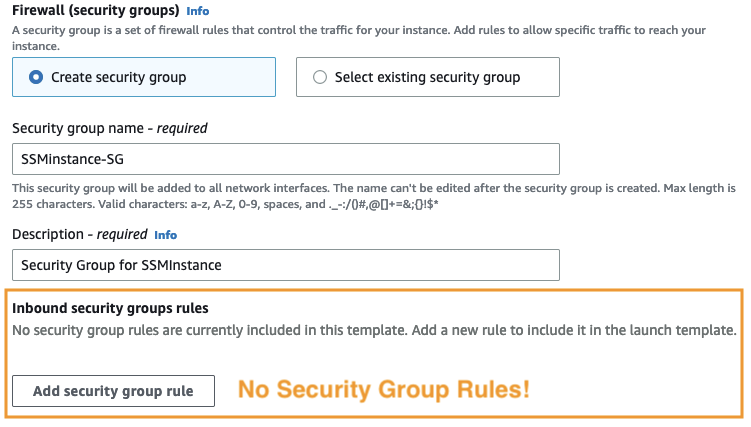
Make sure
Auto-assign public IPis set to enabled inside of Network settings, for Session Manager to connect to it.
I will leave the storage as default.
On
Advanced Settings→ IAM Instance Profile: Select the Role we created in the earlier section. I named it SSMInstanceCore.
Select
Launch Instance🚀
Setting up permissions to access via Session Manager
The minimum policy configuration we’ll for an IAM user to be able to connect to an EC2 instance is as follows:
{
    "Version": "2012-10-17",
    "Statement": [
        {
            "Sid": "ConnectToSSMInstance",
            "Effect": "Allow",
            "Action": [
                "ssm:TerminateSession",
                "ssm:StartSession"
            ],
            "Resource": [
                "arn:aws:ec2:*:*:instance/i-010a4c6d9cb6223e3",
                "arn:aws:ssm:ap-southeast-1:*:session/*"
            ]
        }
    ]
}
You can make it more secure by tightening up this policy. But we'll leave it like above.
Once you attach this policy to a user, they’ll be able to connect to the defined EC2 instance using Session Manager.
NOTE: Installing SSM Agent on your Instance if it's not pre-installed
Before we move further, we need to make sure our EC2 instance has the SSM agent installed. This list provides a list of AMIs that has the agent pre-installed. If you are using an instance that does not have an SSM agent, follow the docs and follow the instructions on manually installing the agent for Linux, Windows or Mac.
Accessing EC2 Instance using Session Manager
You can access EC2 Instance using Session Manager, in 3 different ways:
From the EC2 instance connect option
This will redirect the user to the Session Manager console and start the session from there, but we’ll see how to connect from the Session Manager console after this.
Select your EC2 instance and click on connect.

Select Session Manager and Click on Connect
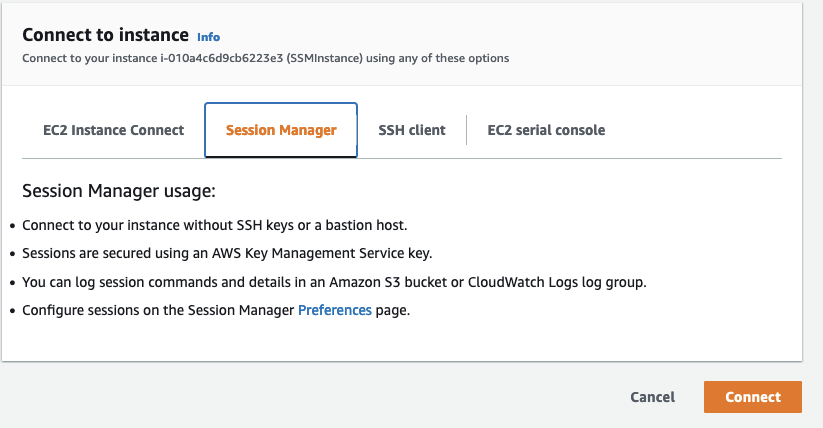
You can start using your instance

Connect from Session Manager
Go to Systems Manager and Select Session Manager on the left-hand side menu.
Click on Start Session
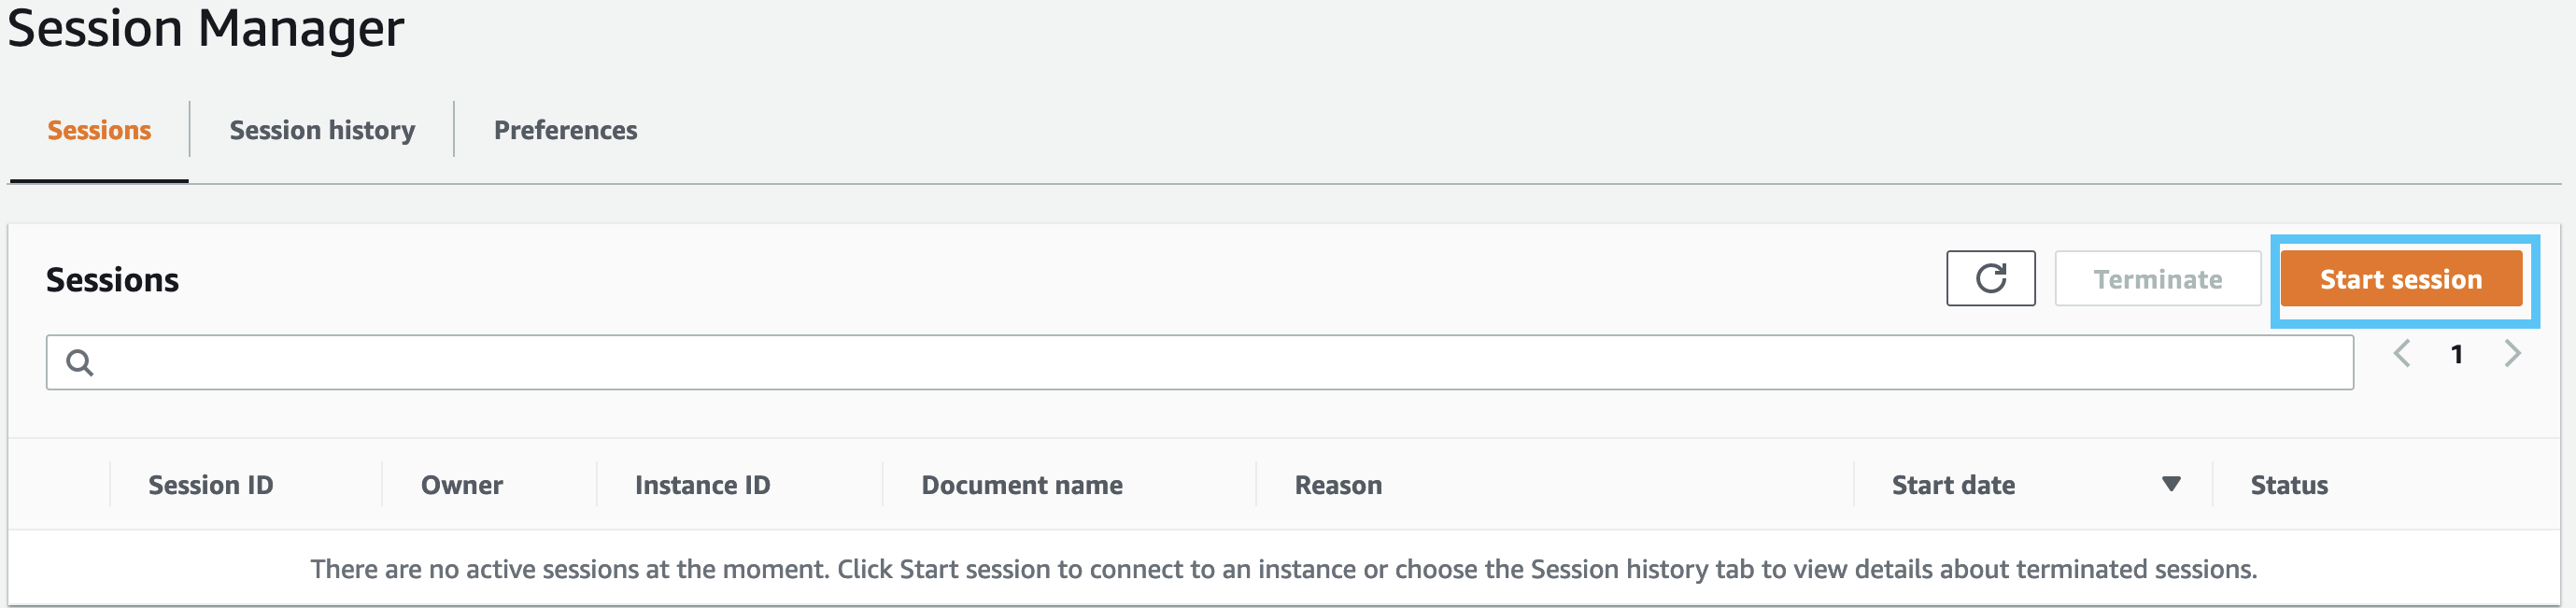
Select the name of the instance you want to connect to and select Start Session

We’ll get the same terminal window, we got from the first option.

Connect from Terminal
Probably my favorite way of connecting to the EC2 instance with the Session Manager is via terminal. For this, you need to have AWS CLI installed on our machine and configured. After that, you need to install the Session Manager plugin for the CLI.
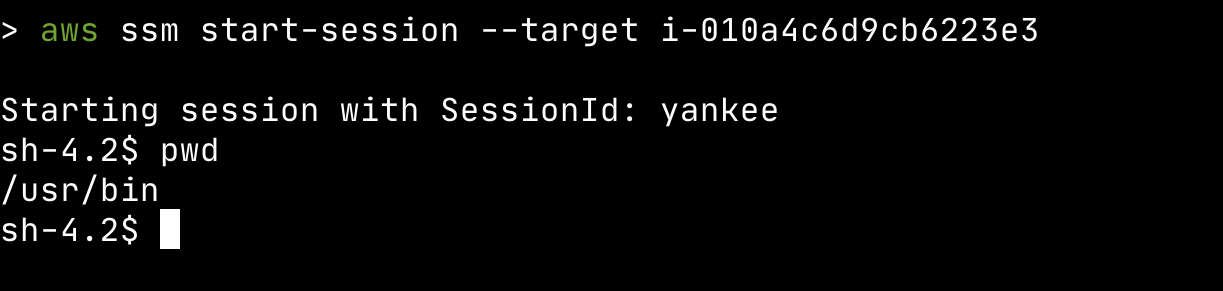
After that, anytime we want to connect to our instance, we can run the following command:
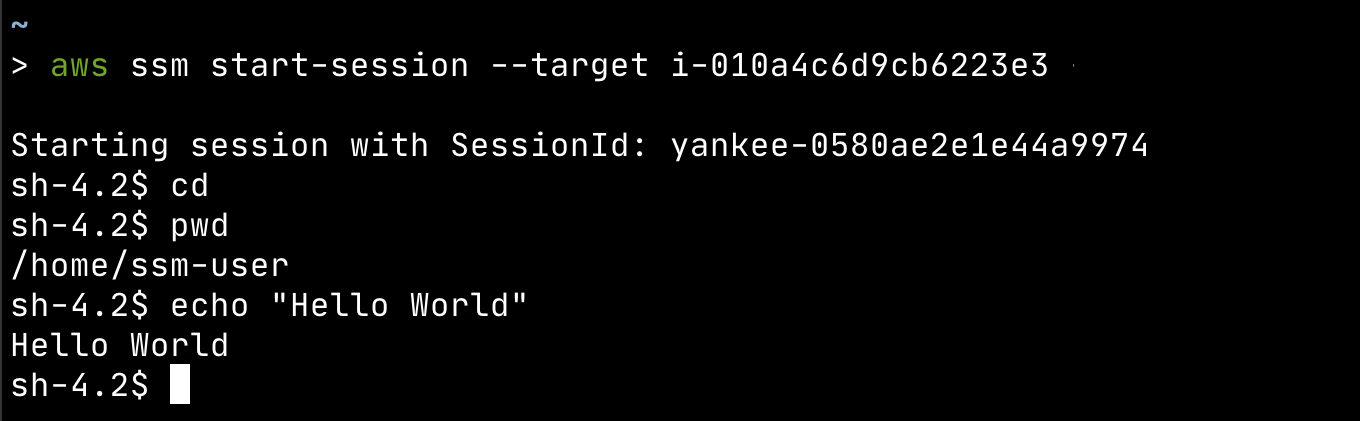
aws ssm start-session --target <instance-id>

aws ssm start-session --target i-010a4c6d9cb6223e3
You’ll get a similar screen as below:
Setting Up Logging
One of the benefits of Session Manager is centralized logging. You can have multiple users doing different things on the instance, and you can track all of that in a single log group in CloudWatch or you can upload it to an S3 bucket. In this blog, we'll be sending it to CloudWatch.
Before we dive into logging, we need to update our Role SSMInstanceCore and attach the CloudWatchAgentServerPolicy. This will allow the EC2 instance to send logs to the CloudWatch log group.
Setup Permission to send logs to Cloudwatch
Go to IAM -> Roles, Search for the role we created earlier(if you are following the blog: it is SSMInstanceCore) and select Attach policies
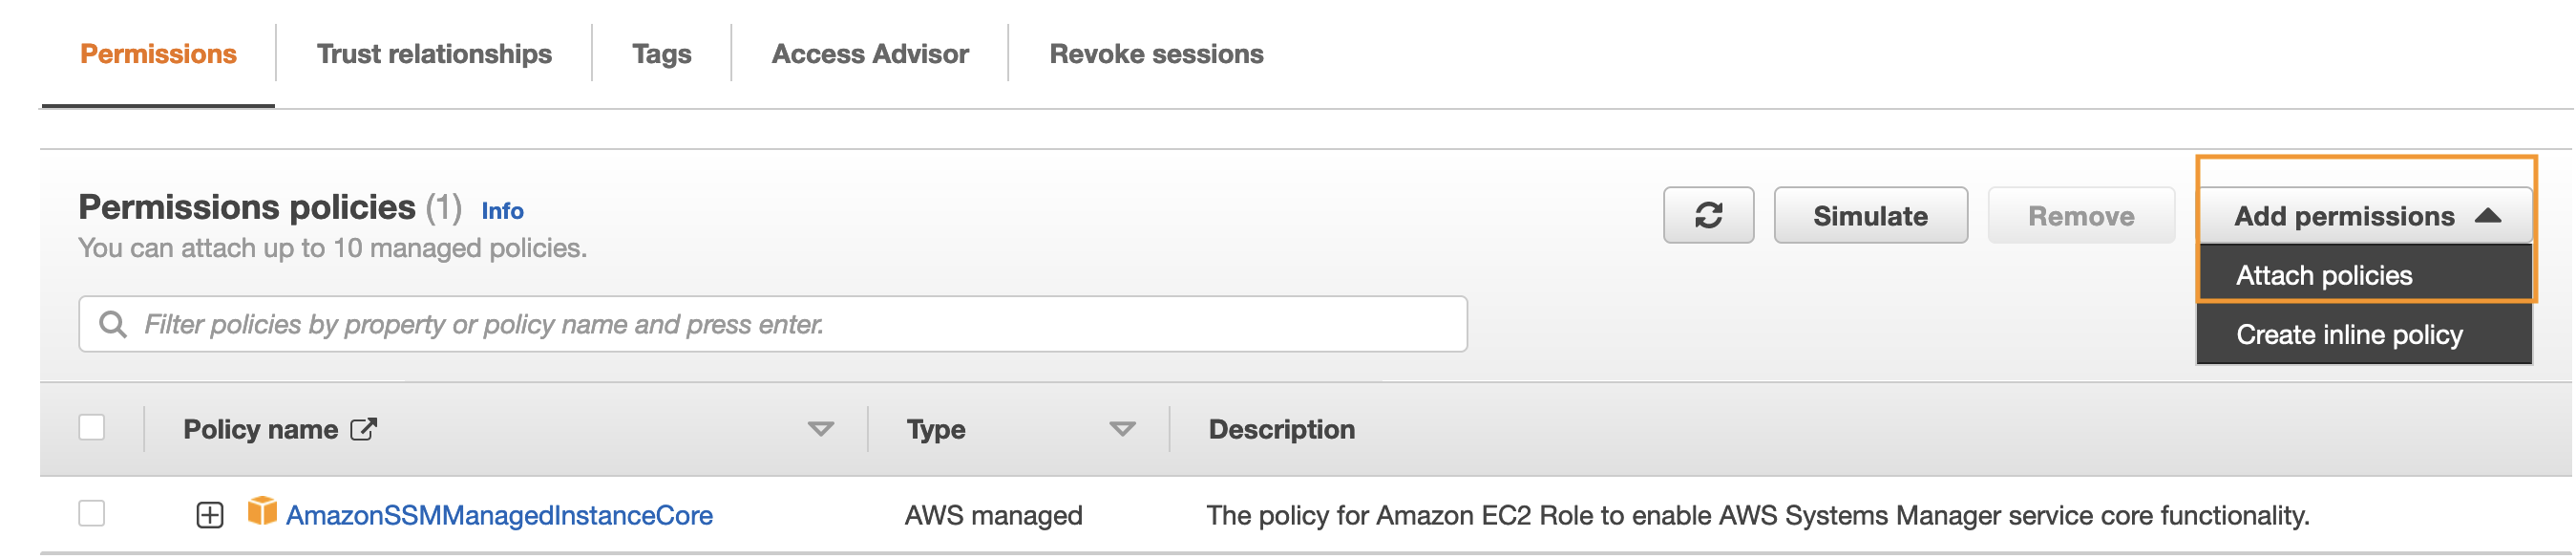
On the search bar, paste CloudWatchAgentServerPolicy and select it and click on Attach Policies.

Create a new Log Group
Before we can send any logs, we need to create a new log group to hold our logs. Run the command below to create a new log group:
aws logs create-log-group --log-group-name SSMInstanceLogs
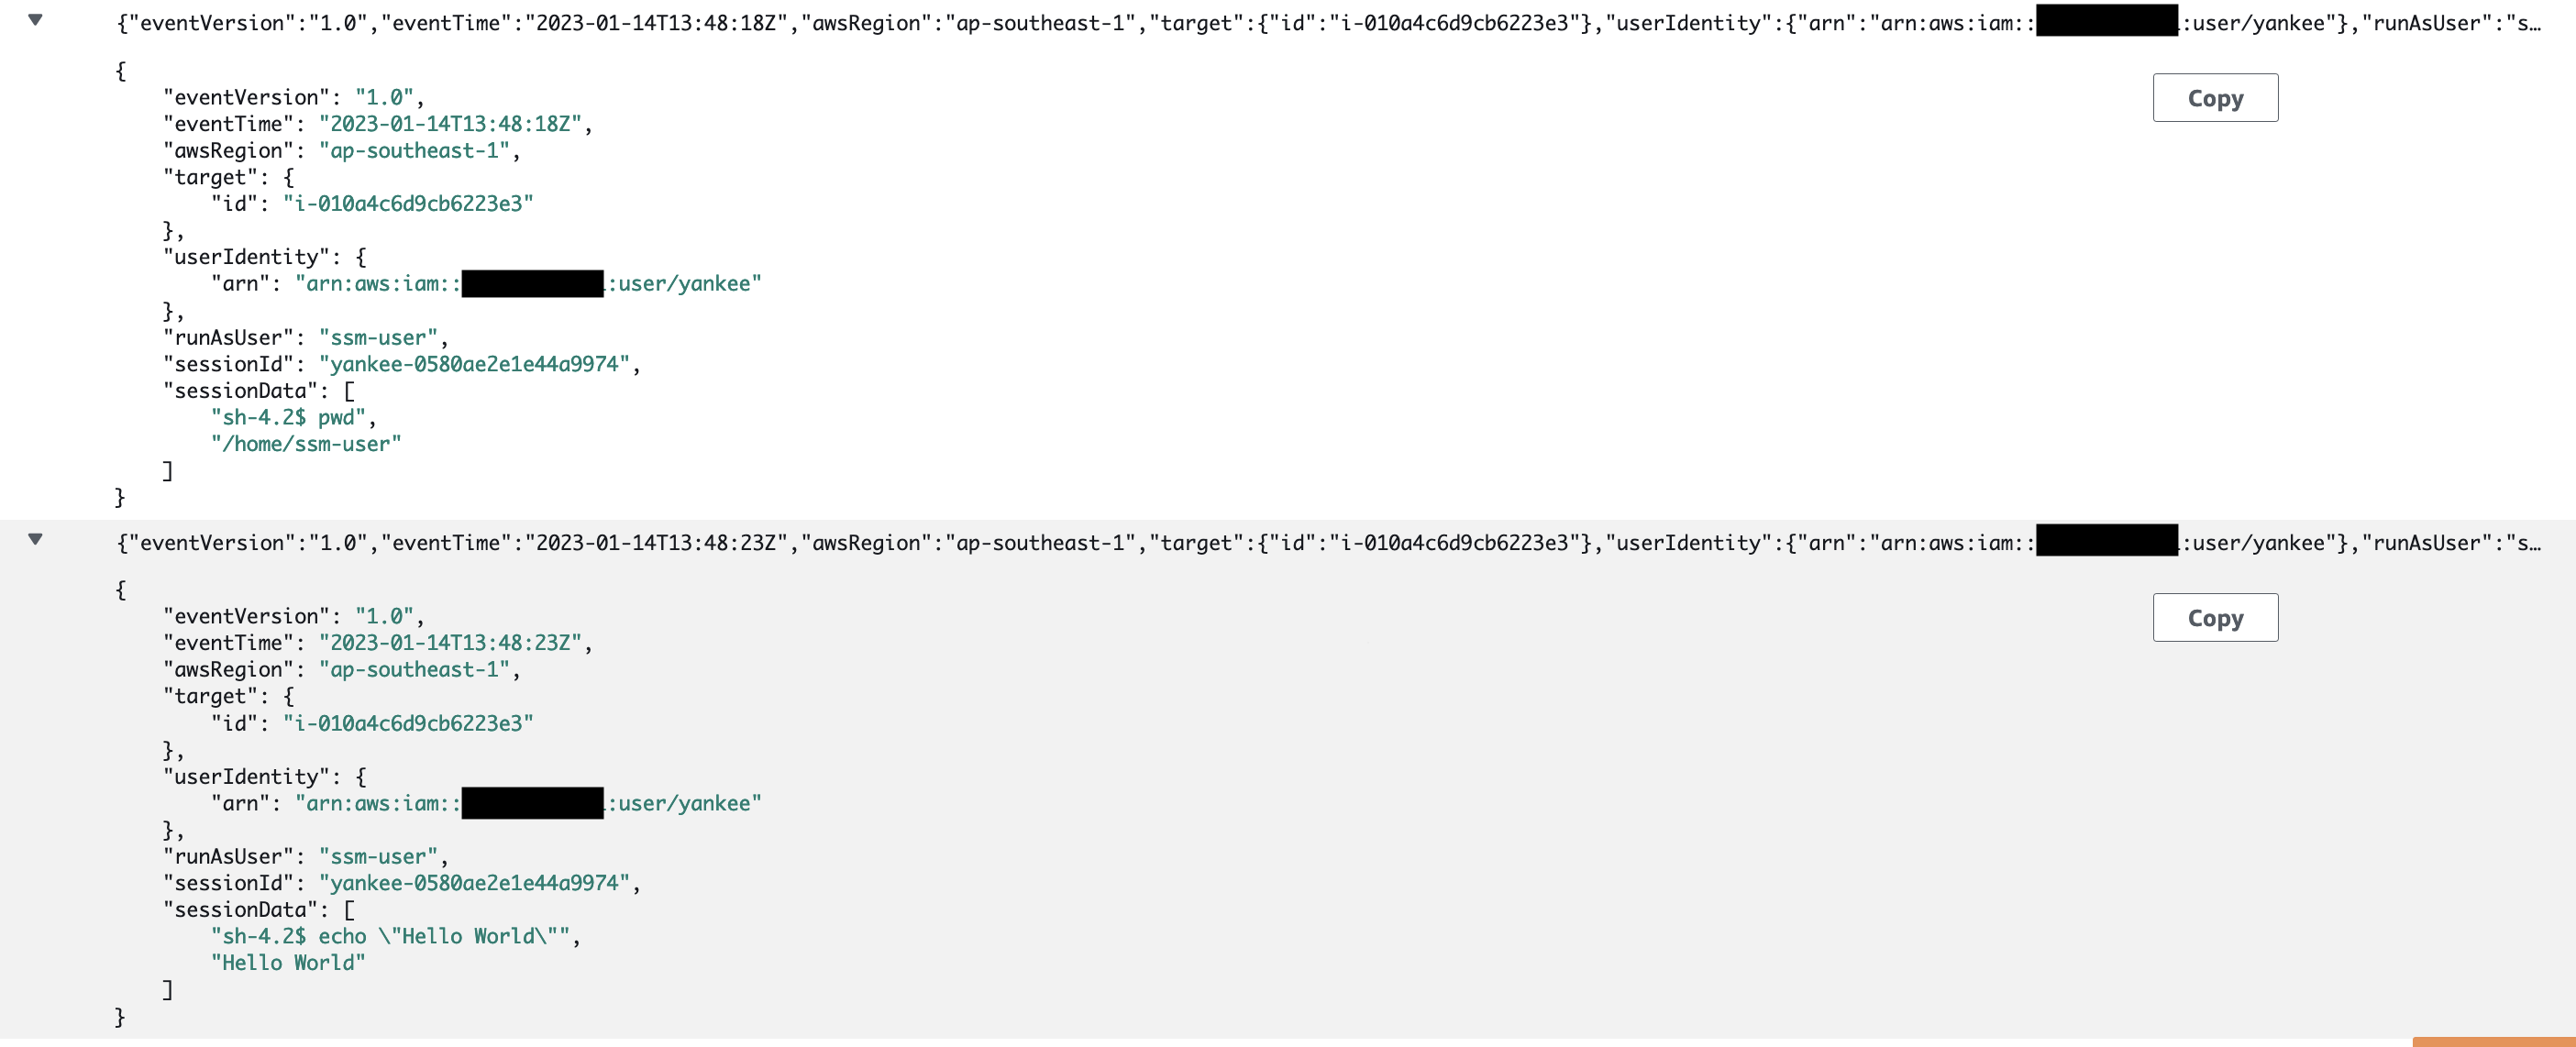
Note: that all the session logs for any EC2 instance will be forwarded to this log group. You can't assign a log group per instance. The best thing is the logs will be JSON formatted so they'll be easy to read.
Send Session Logs to CloudWatch
Now that our EC2 instance has permission to write to CloudWatch, we can go to Session Manager under Systems Manager.
Select the "Preferences" tab and Click on "Edit"
Enable CloudWatch logging and select "Stream session logs"
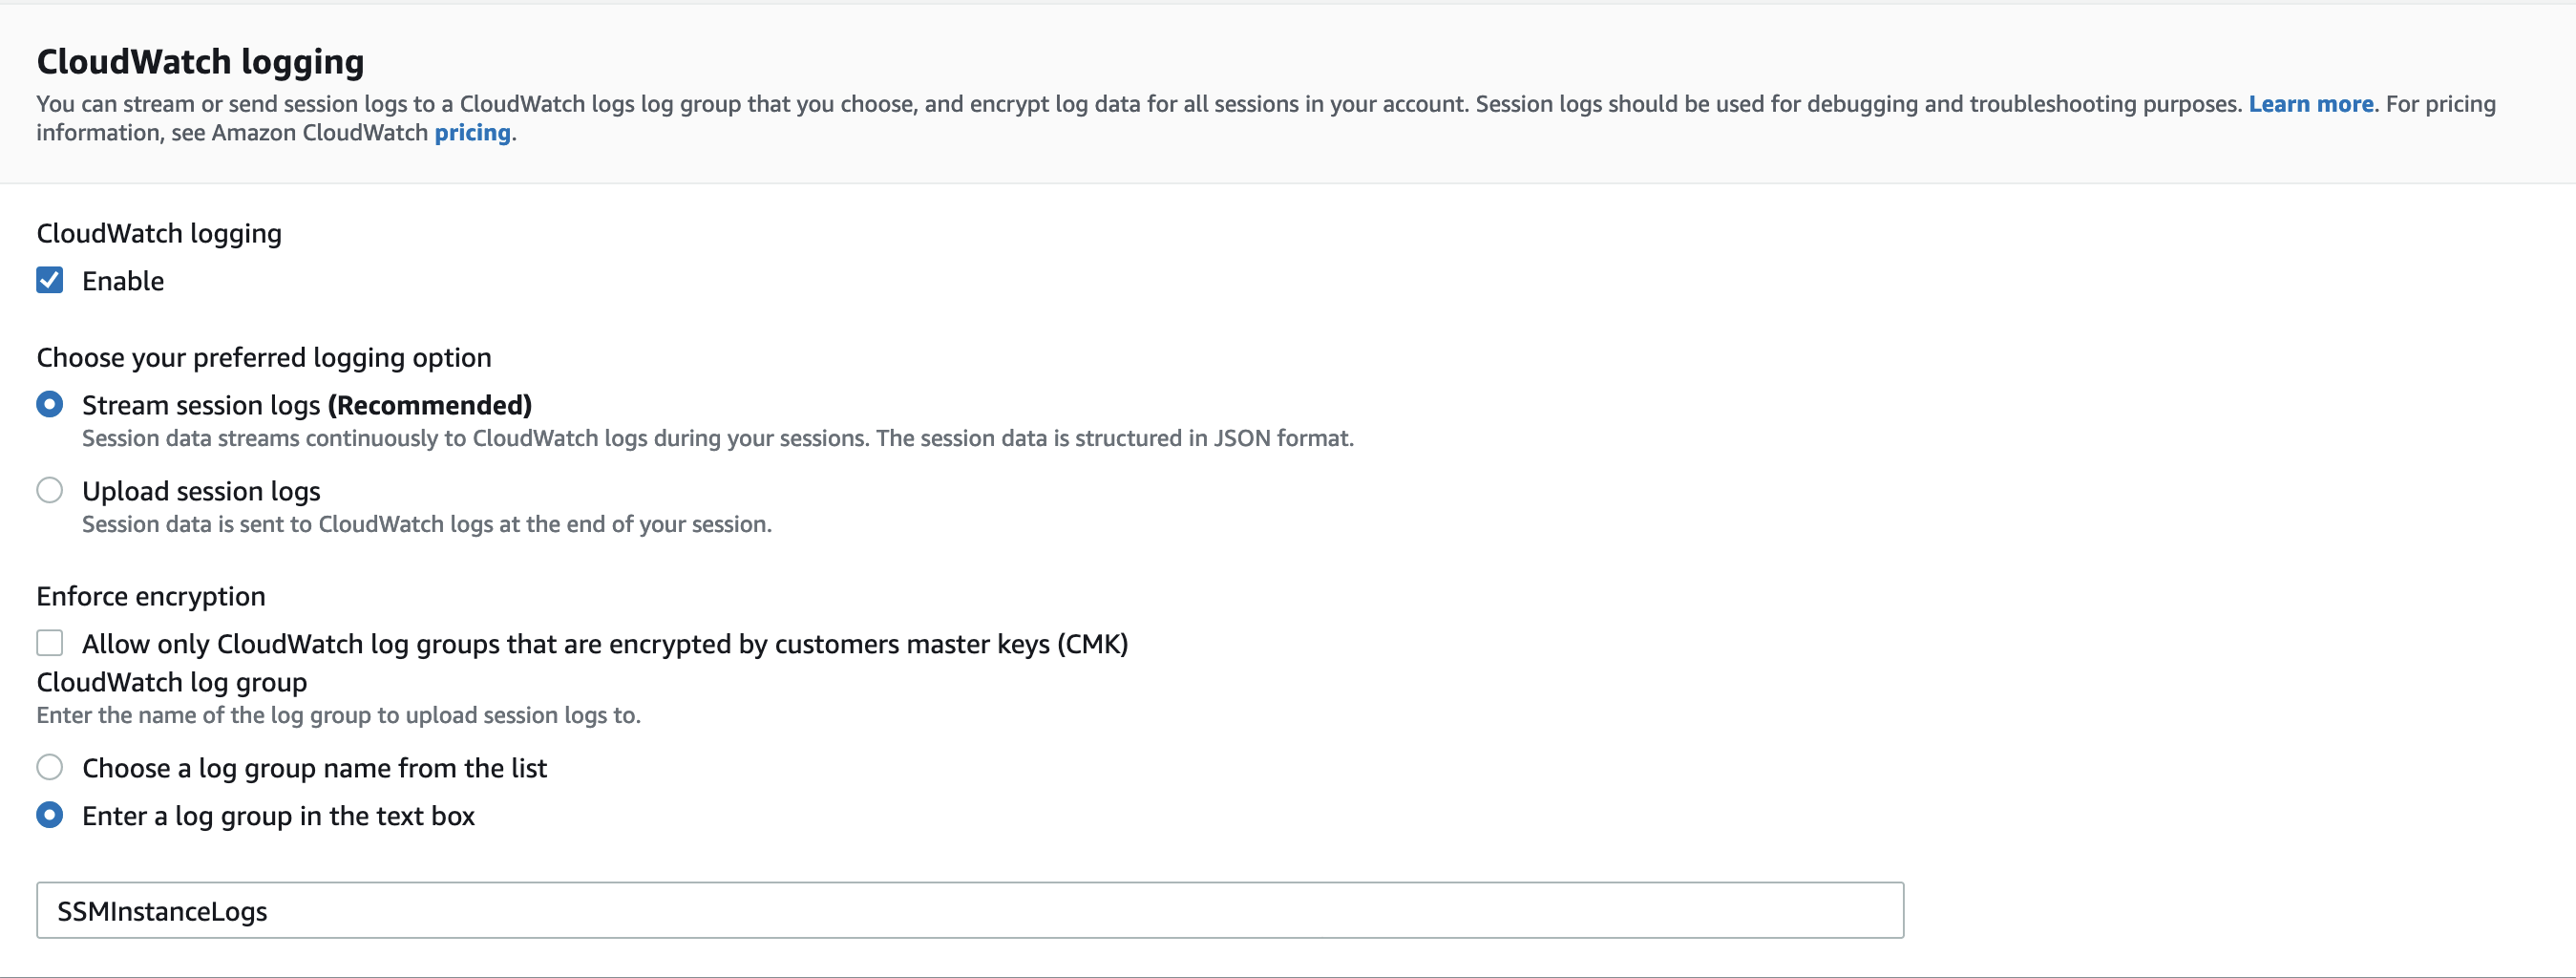
Then add the name of the CloudWatch Log group we created earlier.
Our log group is not encrypted with Customer Managed Keys (CMK) so we do not enable the "Enforce encryption" option.
But a side note, CloudWatch logs are always encrypted using AWS-managed keys.Click on Save
Viewing Logs
Now that we have logs enabled for Session Manager, let's jump into our EC2 instance and run some commands.
Now let's had to our Log Group and check our log stream:
Port Forwarding
Managing Access from EC2 to private RDS
Another common use case of an EC2 instance is to use it as a bastion host (jump server) to connect to resources on a private subnet securely.
Let's say there's an RDS Postgres instance on a private subnet running on port 5432 that we'd like to connect to. RDS has no access to the internet and is accessible only by the services within that VPC.
To connect to this database service we need to:
create an EC2 instance in that VPC
go to the Security Group attached to the RDS instance and, select "Edit inbound rules" and add a new inbound rule with:
type as PostgreSQL
Source as the Security Group name of our EC2 instance.

Then Click on Save.
That's it! Now our EC2 instance has access to RDS. Now we can use our EC2 instance as a bridge to connect our local machine to the RDS instance.
Connecting to private RDS
Session manager makes it easy to forward port from our EC2 instance with the use of Documents. Documents are blueprints of action that the Session manager performs on our EC2 instances. AWS manages hundreds of these documents for common actions and they have one for Port Forwarding too.
To view what documents are available. Go to System Managers, and on the left-hand menu you can find "Documents" under "Shared Resources".
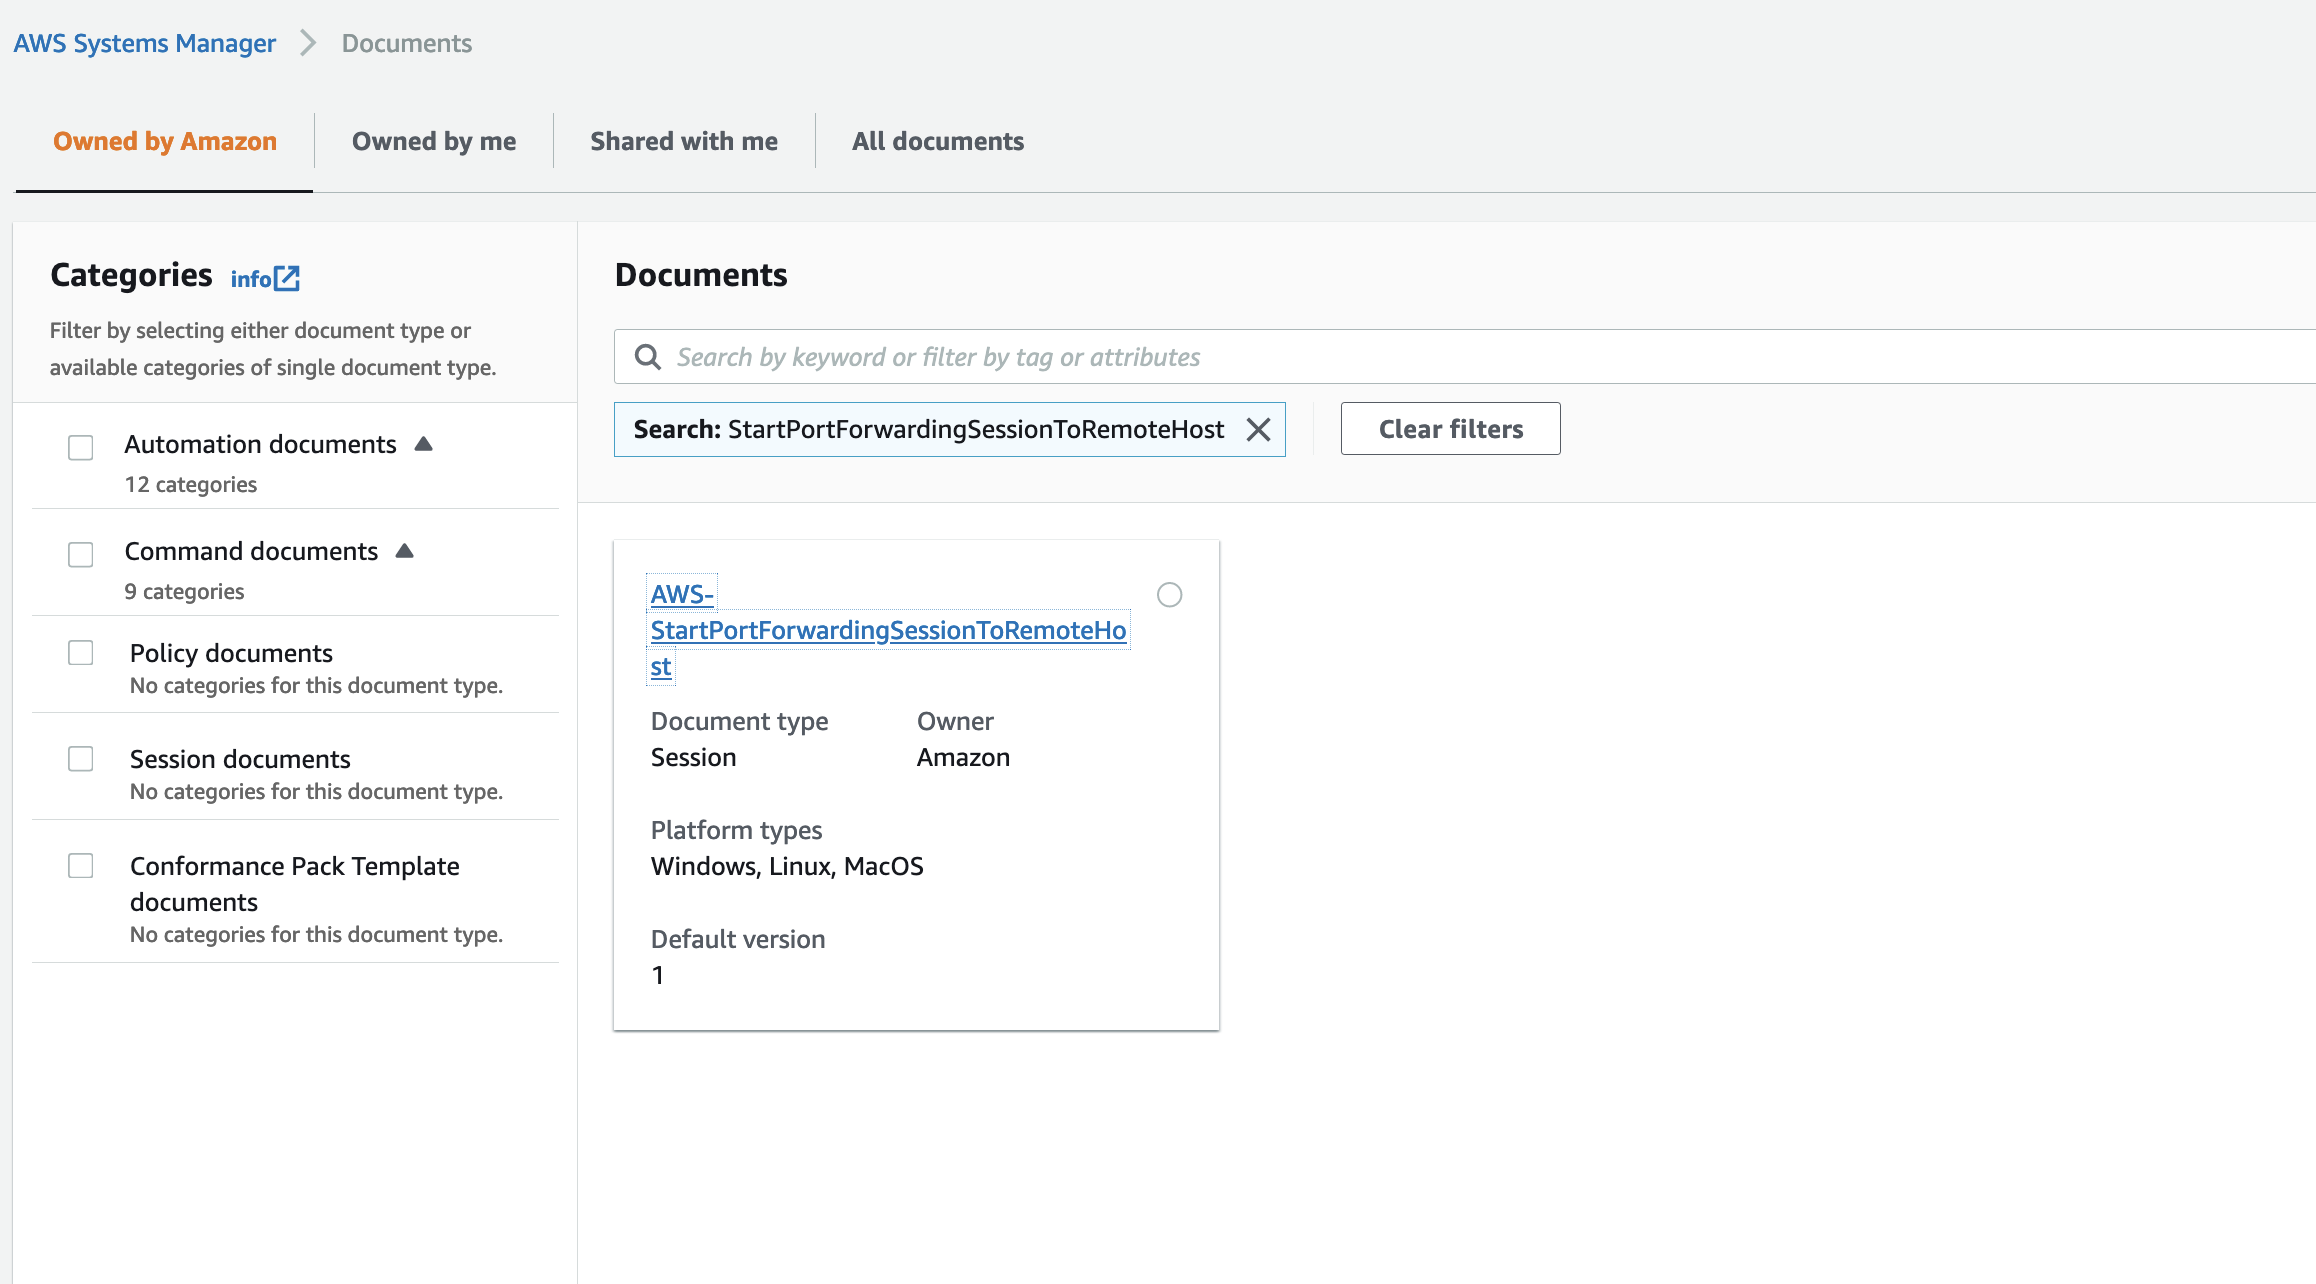
The document we are going to use is titled AWS-StartPortForwardingSessionToRemoteHost. You can search for it in the Documents section to get its details. Click on the result.
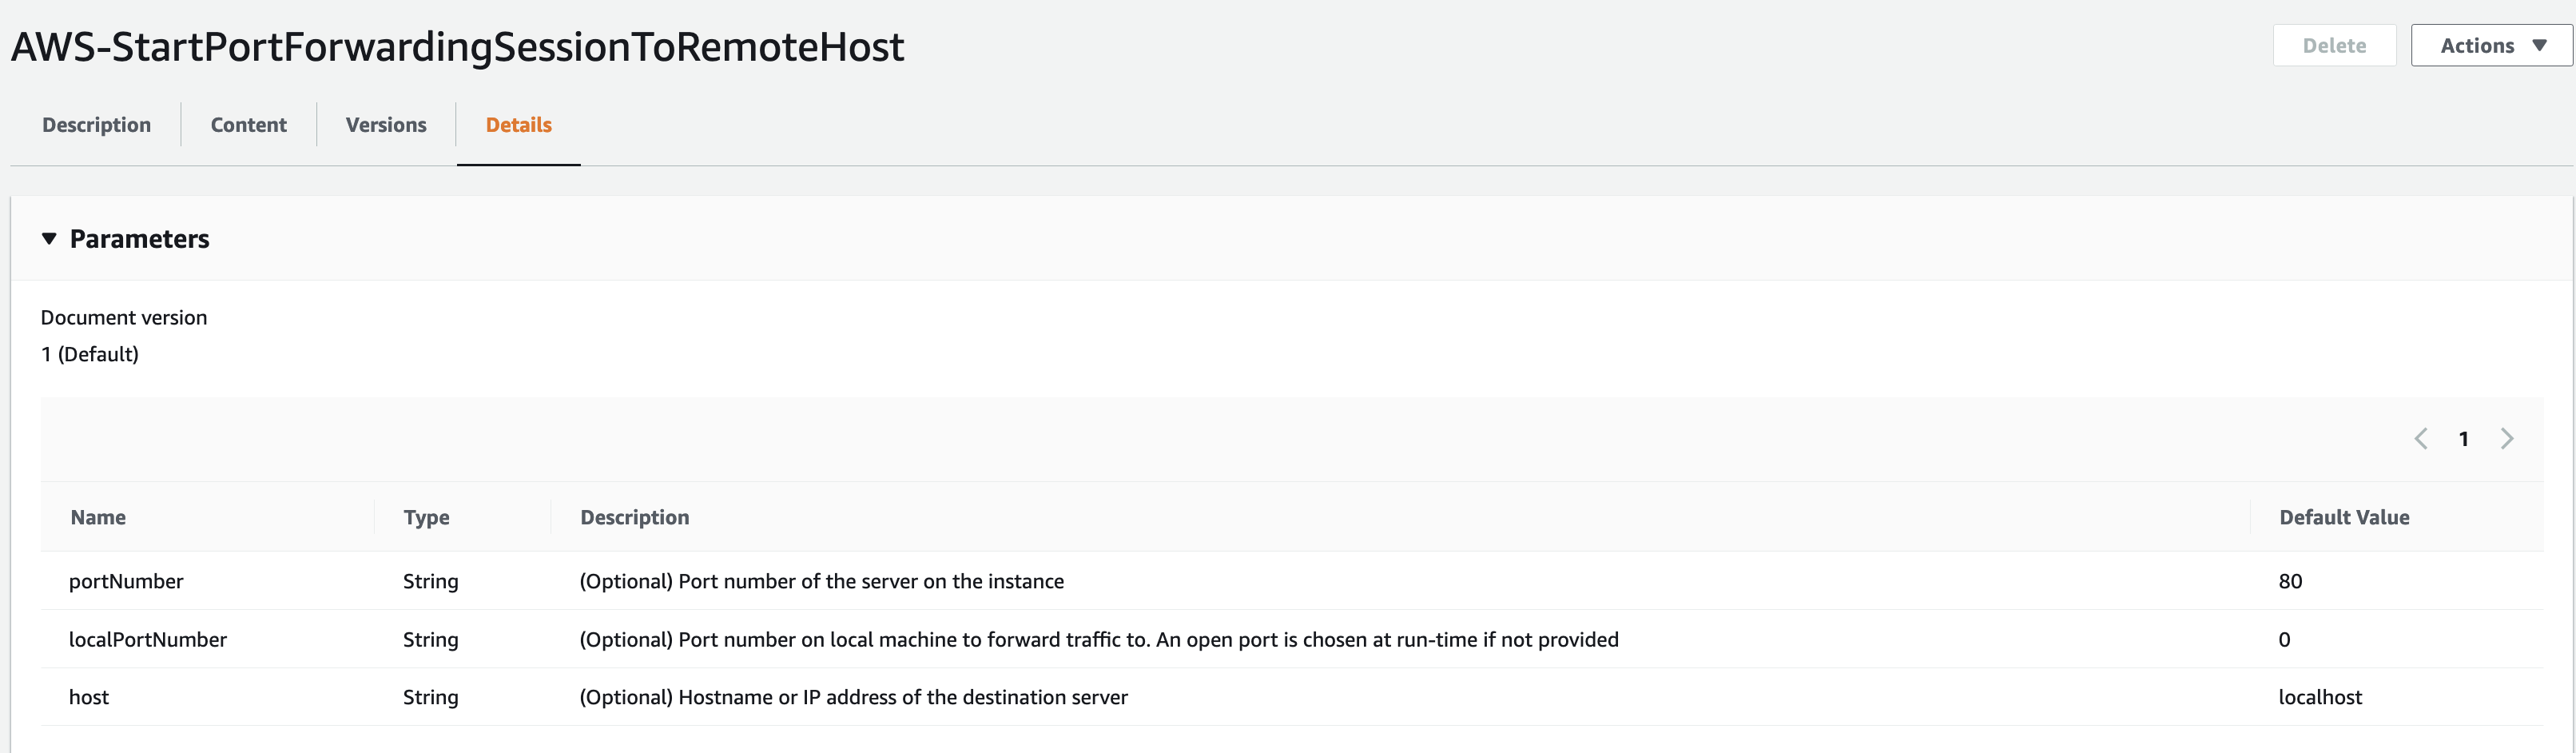
Go to the Details tab and under Parameters section you can find what parameters we can pass to this document. Parameters are passed as a key-value pair.
To use this document, we need to update the policy we created above for users:
{
    "Version": "2012-10-17",
    "Statement": [
        {
            "Sid": "ConnectToSSMInstance",
            "Effect": "Allow",
            "Action": [
                "ssm:TerminateSession",
                "ssm:StartSession"
            ],
            "Resource": [
                "arn:aws:ec2:*:*:instance/i-010a4c6d9cb6223e3",
                "arn:aws:ssm:ap-southeast-1:*:session/*",
                "arn:aws:ssm:*:*:document/AWS-StartPortForwardingSessionToRemoteHost",
            ]
        }
    ]
}
Now the only thing we need to grab is the database host URL.
You can go to the RDS instance and on the "Connectivity & Security" tab find "Endpoint & port". Now we have the parameters gathered for port forwarding let's see it in action.
aws ssm start-session --target i-010a4c6d9cb6223e3\
    --document-name AWS-StartPortForwardingSessionToRemoteHost \
    --parameters '{"portNumber":["5432"],"localPortNumber":["5432"],"host":["testdatabase.csrc3be2awyi.ap-southeast-1.rds.amazonaws.com"]}'
I am port forwarding from RDS on a private subnet to my local machine on port 5432. Since I am using Postgres I can connect to it using the following command:
psql -U postgres -h localhost -p 5432

That's it! Now you have a connection to a private RDS instance from your EC2 instance using session manager. ✨
Conclusion
Session Manager is a powerful tool from a security and usability perspective. There are many actions you can do with it on an EC2 instance and having the power of Documents makes it more resourceful.
If you have any suggestions or queries about this article, you can reach out to me on Twitter or add a comment below. 🎉